Simplifying open-source contributions & Git-GitHub: A Practical Guide

DevOps Engineer @ IDfy | Mentor @ GSSoC '24 / WoB '24
In this blog, I'll be explaining Git-GitHub to the extent that is enough to do open-source contributions like a professional. I'll also demonstrate a straightforward approach to contributing, you can use this approach without a second thought for most of your contributions.
Open source refers to software whose source code is freely available to the public and can be modified, studied, and distributed by anyone. Open-source software is often created collaboratively by a community of developers who share their work and contribute to the improvement of the software.
Why contribute to Open Source?
Open source is the future, day by day we see more and more freely available open-source software (Hashnode being one of them) coming to the tech world.
You get to connect with a lot of folks, work and learn under their guidance.
It opens the doorway to remote jobs where you can work at your leisure.
Let us start with the basics (If you are familiar with the basics, feel free to jump to the last section)
What is Git?
Git is a VCS (Version Control System) used to track changes in a repository (repo) or folder.
Both code and non-code (documentation) changes are tracked using Git.
Git is used to collaborate on code (multiple developers working on the same code).
When you make a change in your project, you won't have to send the files to all the team members, just send a PR. (Pull Request)
What is GitHub?
GitHub is a web-based platform for hosting and managing Git repositories. It provides developers with a centralized location to store and manage their code, collaborate with others, and track changes over time.
It is like Google Drive for all your code with collaboration features :)
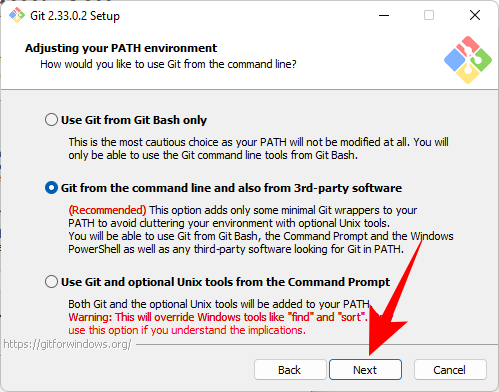
Installation
Go to this link: Git download
Download the version as per your system and install it.
Make sure to go with the recommended options.
Lastly, make sure the path in the system is enabled for all terminals (even 3rd party) and not just Git Bash.
Verifying installation
git --version

This command shows the version of Git installed on your system. Next, you can go around exploring Git using by writing just "git" or ''git --help'
git
git --help
Configuring Git for the first time
git config --global user.name “<Enter your username here>”
git config --global user.email “<Enter your email here>”
Fork & Pull Request
The forked repo is the clone of the main repo that you want to contribute into. It is the copy of the main repo, it is made to ensure that the main code is not directly affected.
Any change made in the forked repo does not affect the main repo. When you make a change in your forked repo by pushing the changes (sending the changes) you get the option of creating a Pull Request.
Pull Request is the request you send to the maintainer or owner of the main repo to merge your code in their codebase. The name “pull request” comes from the idea that you're requesting the project to “pull” changes from your fork.
Basic Git commands and features
git init: To initialize an empty git repository on your local system.
This means that every change in the folder in which this command is executed will be tracked by git.
git init
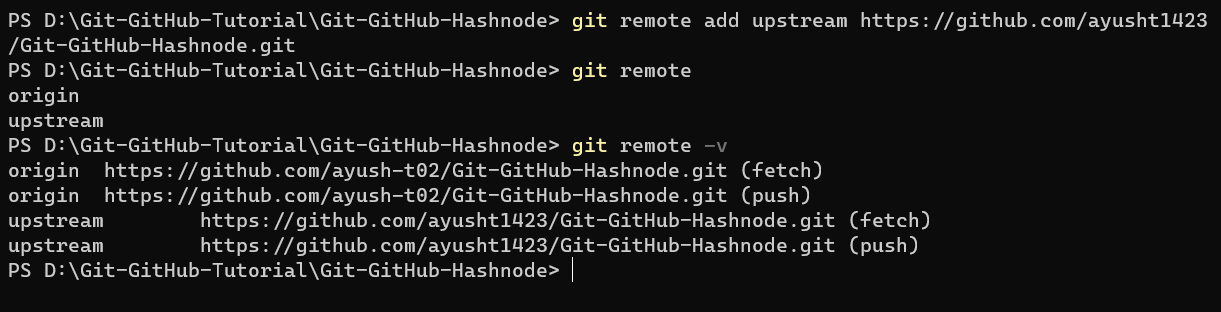
git remote: To check and manipulate the URLs associated with the repository.
URLs mean the GitHub repo link that you need to collaborate on.
git remote specifies the names of the URLs associated with the git local repo.
git remote -v is the verbose version of this, that is, it shows the names of the URLs along with the URLs. (output attached in last section)
git remote
git remote -v
git remote add <url-name>: To add a remote URL. The URL name can be anything, but the standard convention is to name the forked repo URL "origin" and the main repo URL "upstream".
git remote rm <url-name>: To remove a URL from the list of remote URLs for a repo.
A local git repo can have any number of remote URLs, just make sure that names are unique.
Remote URLs are nothing but GitHub repo links.
git remote add <url-name> <url>
git remote rm <url-name>
git branch: To check which branch is currently active. All the changes done in one branch are associated with that branch only and do not have any effect on any other branch.
git branch
git branch <branch-name>: To create a new branch.
git branch <branch-name>
git checkout <branch-name>: To change the current working directory. (to move to a different branch)
git checkout <branch-name>
git checkout -b <branch-name>: This is a shortcut to create and move to the branch in just one command.
git checkout -b <branch-name>
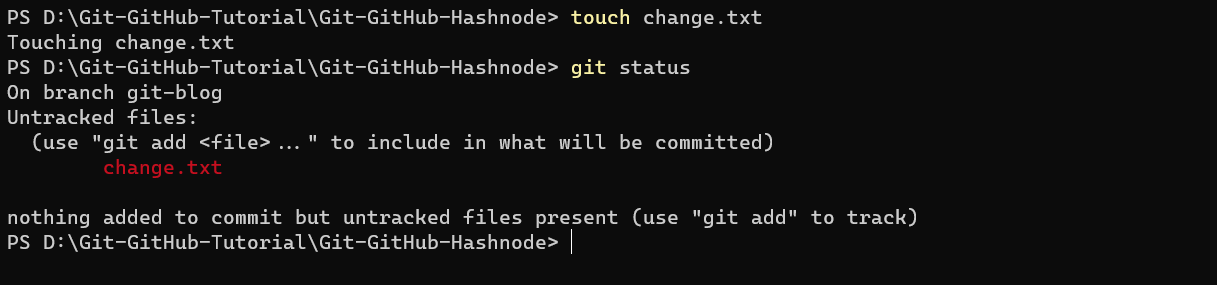
git status: To check the status and changes in the working directory. (any and every change in the repo is tracked, but this command shows the changes associated only with the current branch)
git status
git add: Adding the changes / staging the changes.
In Git, there is a concept of a staging area and working directory.
Working directory - the directory/folder of the current branch constitutes the working directory, the WD is different for different branches. It means that every branch has different files because every branch is used to develop a different feature without any over-ridding of any other branch.
Staging area - Here we don't make any changes, it is automatically handled by Git, a file is said to be in the staging area when it is added to it using the git add command.
git add <file-name>
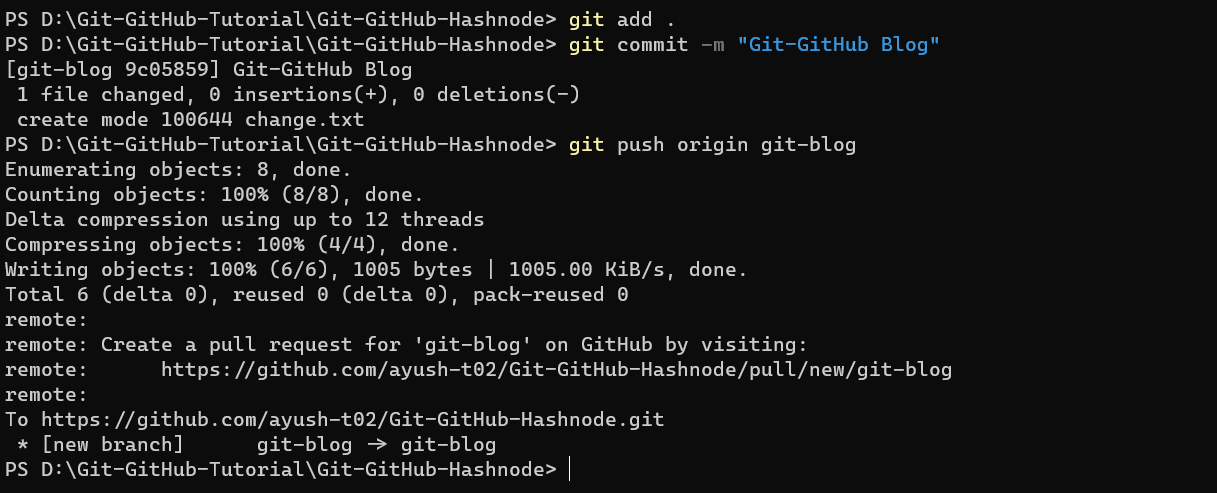
git add .
git commit: Committing the changes with a custom message. This creates a commit for all the files added previously using git add.
git commit -m "commit-message"
git push: Pushing the changes to the repo.
Remember, only one PR (Pull Request) is associated with one branch. So, if you push another change through the same branch before merging of PR, it will just get added to the same PR.
git push <remote-url> <branch>
If you are the maintainer then no Pull Request is required but in the case of collaborators a PR or Pull Request needs to be sent to the main repo from your forked repo.
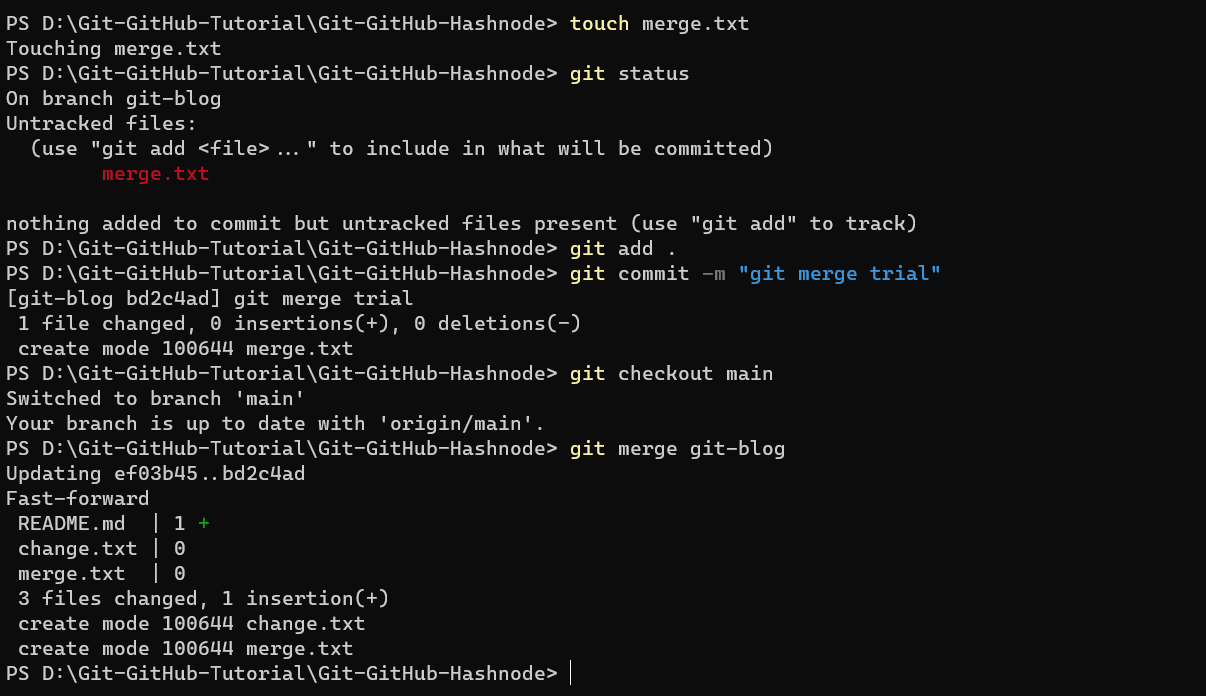
git merge: To merge any branch with any other branch. This is generally used to merge any other branch with the main branch.
git merge <branch-name>
git log: To check the commit history of the working directory of the current branch.
git log
Rolling back to previous versions is one of the most important features of a VCS. In the case of Git, this can be done in many ways: git reset, git revert, etc. But to keep the process simple and easy to understand I'll stick to git reset.
git reset: To move to any previous commit from the history.
There are two types of reset - hard and soft, but for simplicity purposes, just use the command as written. You will eventually have to learn the advanced commands as per your needs.
There is also a command known as git revert, now this command is the same as git reset with the only difference being that it created a new commit to go back to any commit. For a straightforward approach, let's stick with git reset.
git reset <commit-id>
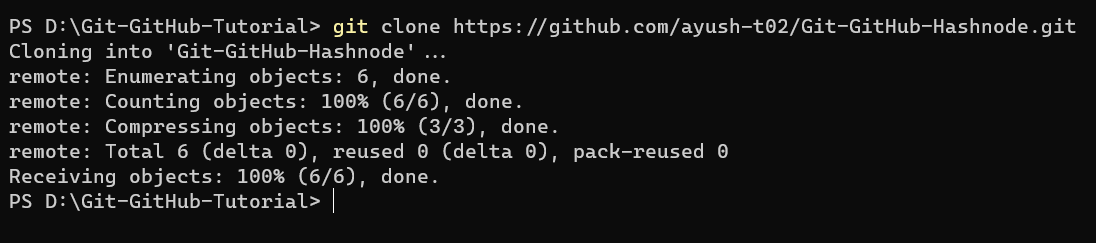
git clone: To create a copy of the fork that you have created of any GitHub repository on your local system.
git clone <repo-url>
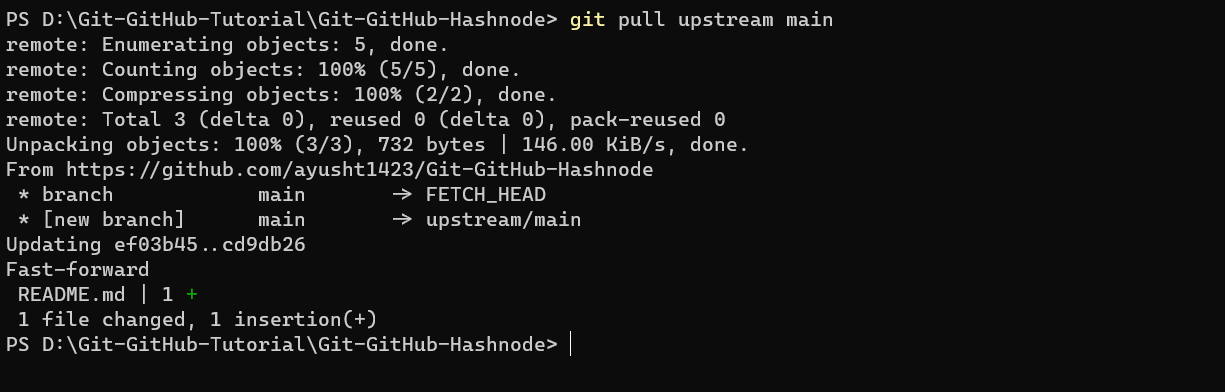
git pull <remote-url> <branch-name>: To pull the changes in the upstream GitHub repository onto your local system.
If multiple developers are working on a project, it generally happens that before you submit your PR some other developer's PR is already merged and the entire codebase is updated on GitHub. So, it is advisable to pull changes onto your local system and forked repo from time to time. It is especially important before submitting a new PR.
git pull <remote-url> <branch-name>
git stash: To stash all changes which were being tracked by Git. This rolls back the entire branch to the way it was before any change was done (Note: doesn't rollback a commit)
git stash pop: To bring back the changes saved in the stash.
git stash drop: To delete the stash files and changes.
For example, you were working on a feature but due to time constraints have to work on some other feature, so you just stash the changes and after completing the required work you pop the stash back and continue your work.
git stash
git stash pop
git stash drop
Possible Roles in Open-Source
There are three roles possible - Owner, Maintainer and Collaborator.
Owner - In this role, you are the one who has created the repo and is responsible for maintaining it.
Maintainer - This role is found in projects which are considerably large and cannot be maintained by a single developer. Maintainers have certain admin rights given to them by the owner and they make sure that the codebase doesn't break.
Collaborator - In this role, you have forked (explained ahead) the repo for collaboration purposes and are responsible for pushing changes to the code.
(For open-source contributions, you are the collaborator or contributor)
Approach for open-source contributions
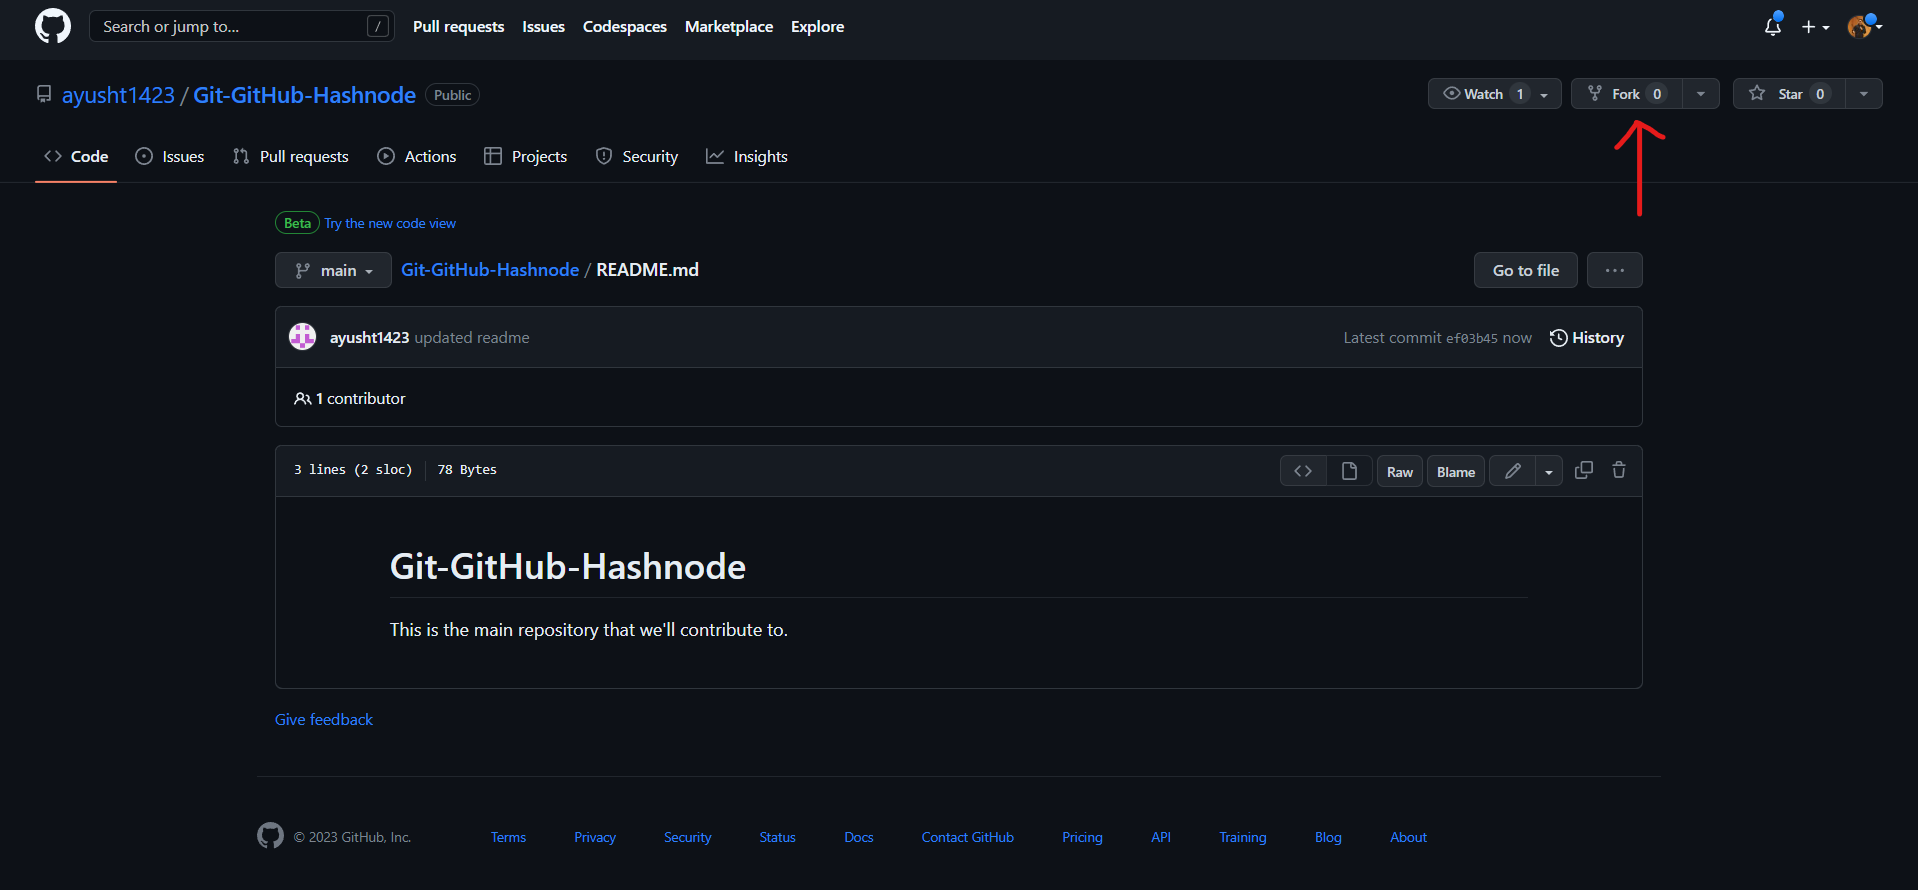
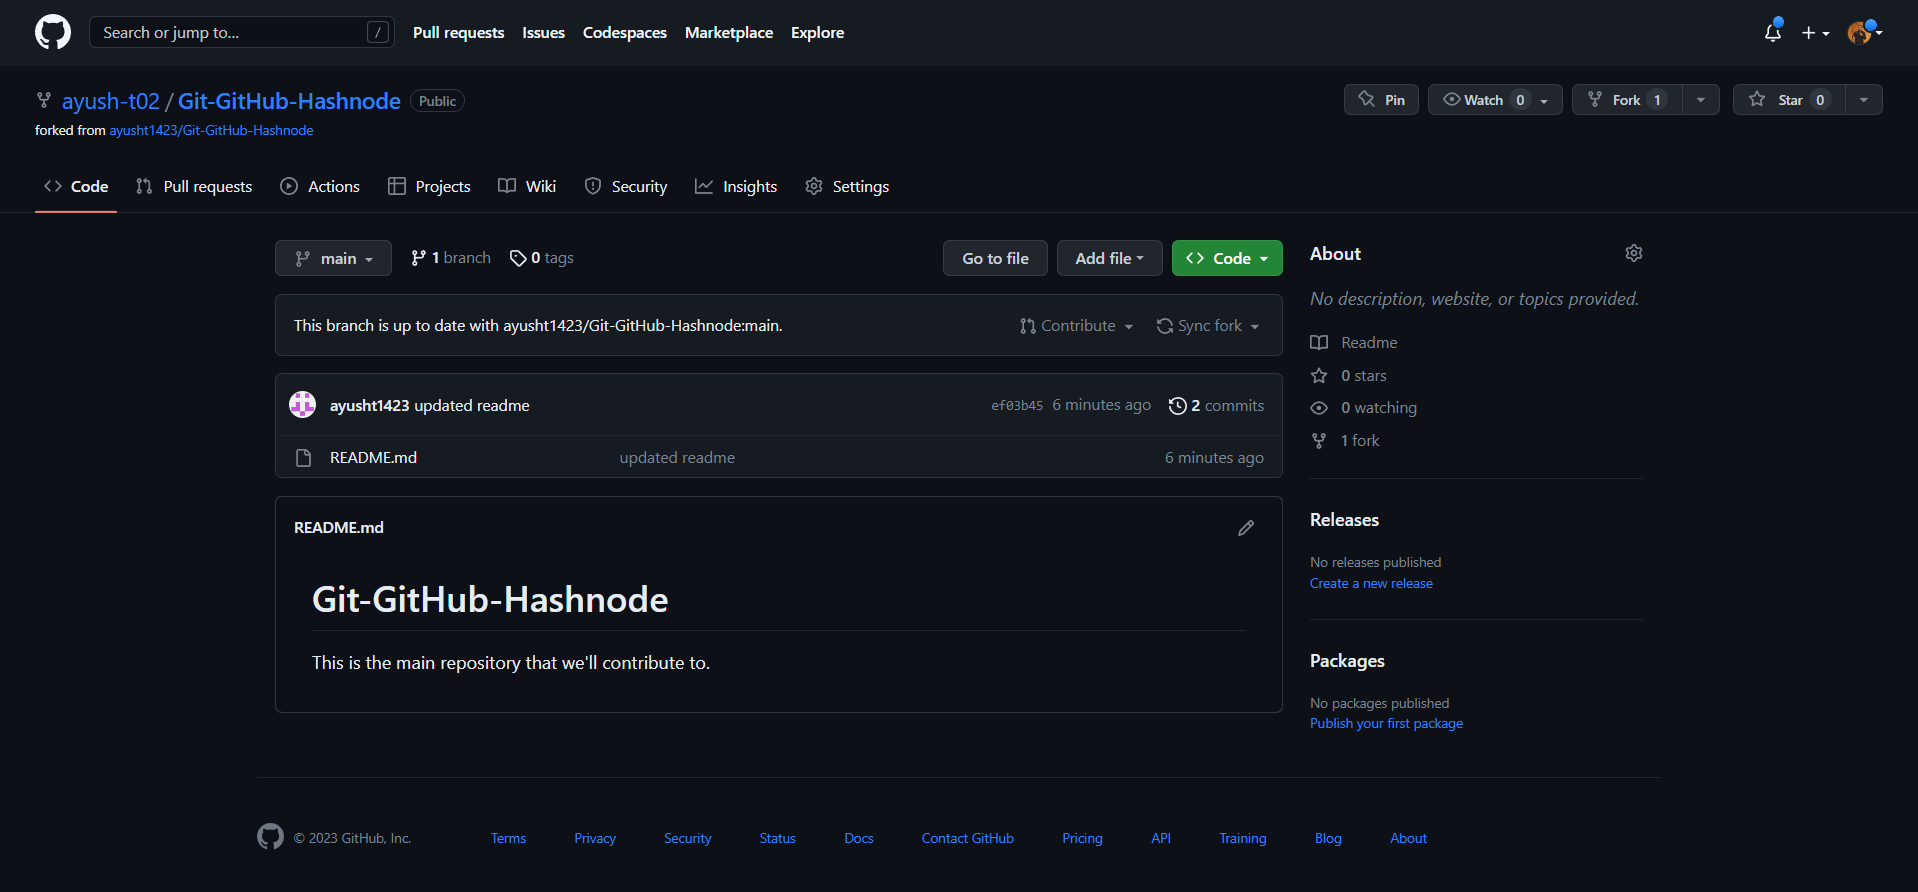
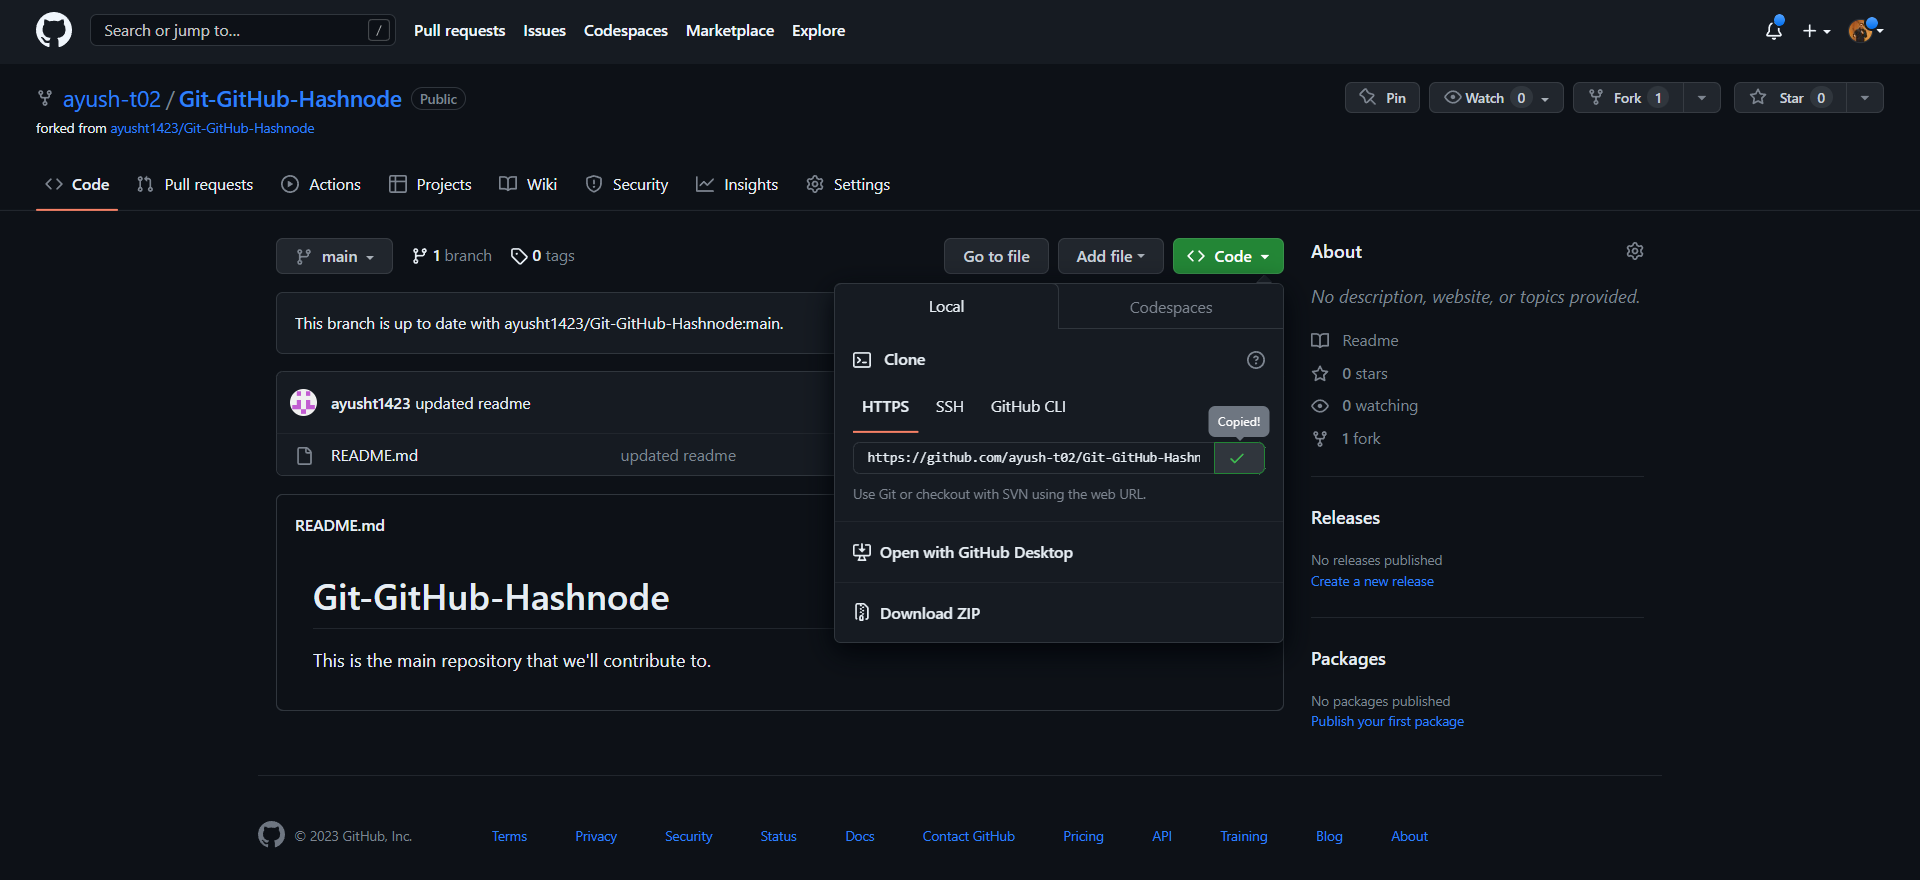
1. Fork the repo you want to contribute in
This is the forked repository, the top-left corner shows the "forked from" repo.
2. git clone (init is included)
3. git branch (never make changes on the main branch)
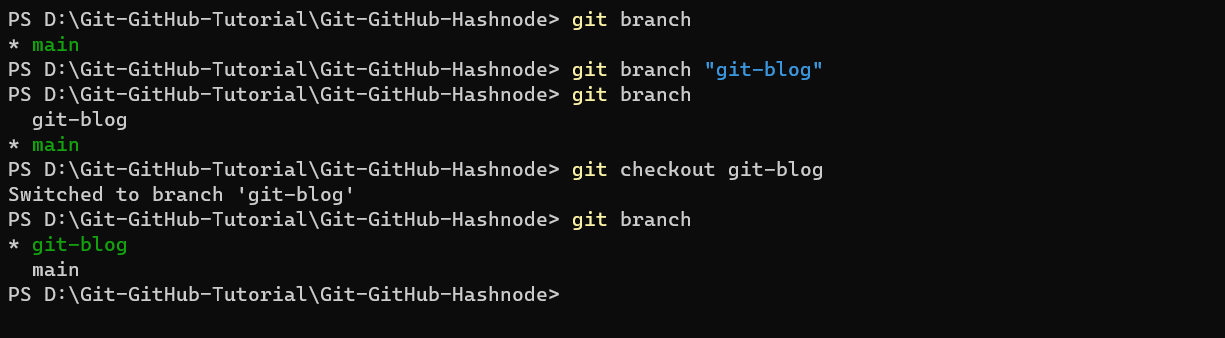

Creating a new branch and then moving to that branch.
4. Add the required remote URLs
5. git pull (always make sure your local repo is up to date with the main repo)
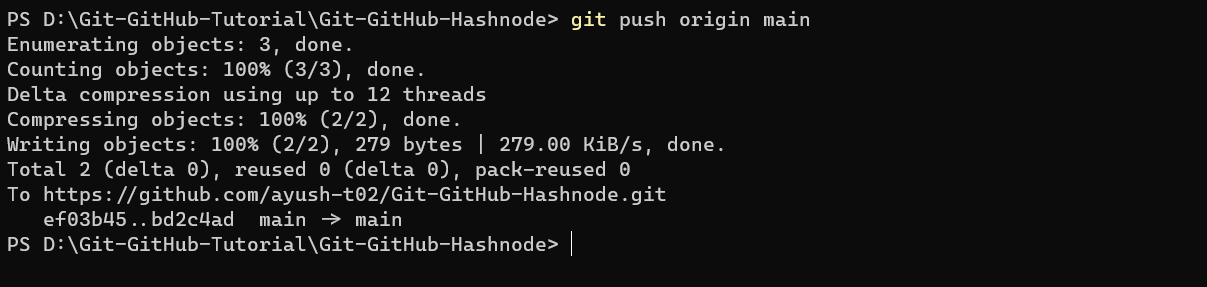
6. git ACP - add, commit, push (make changes / create new feature)
First, make some changes / Add a feature.
You can make changes in a branch and merge (git merge) it with the main branch then push the main branch instead as well.
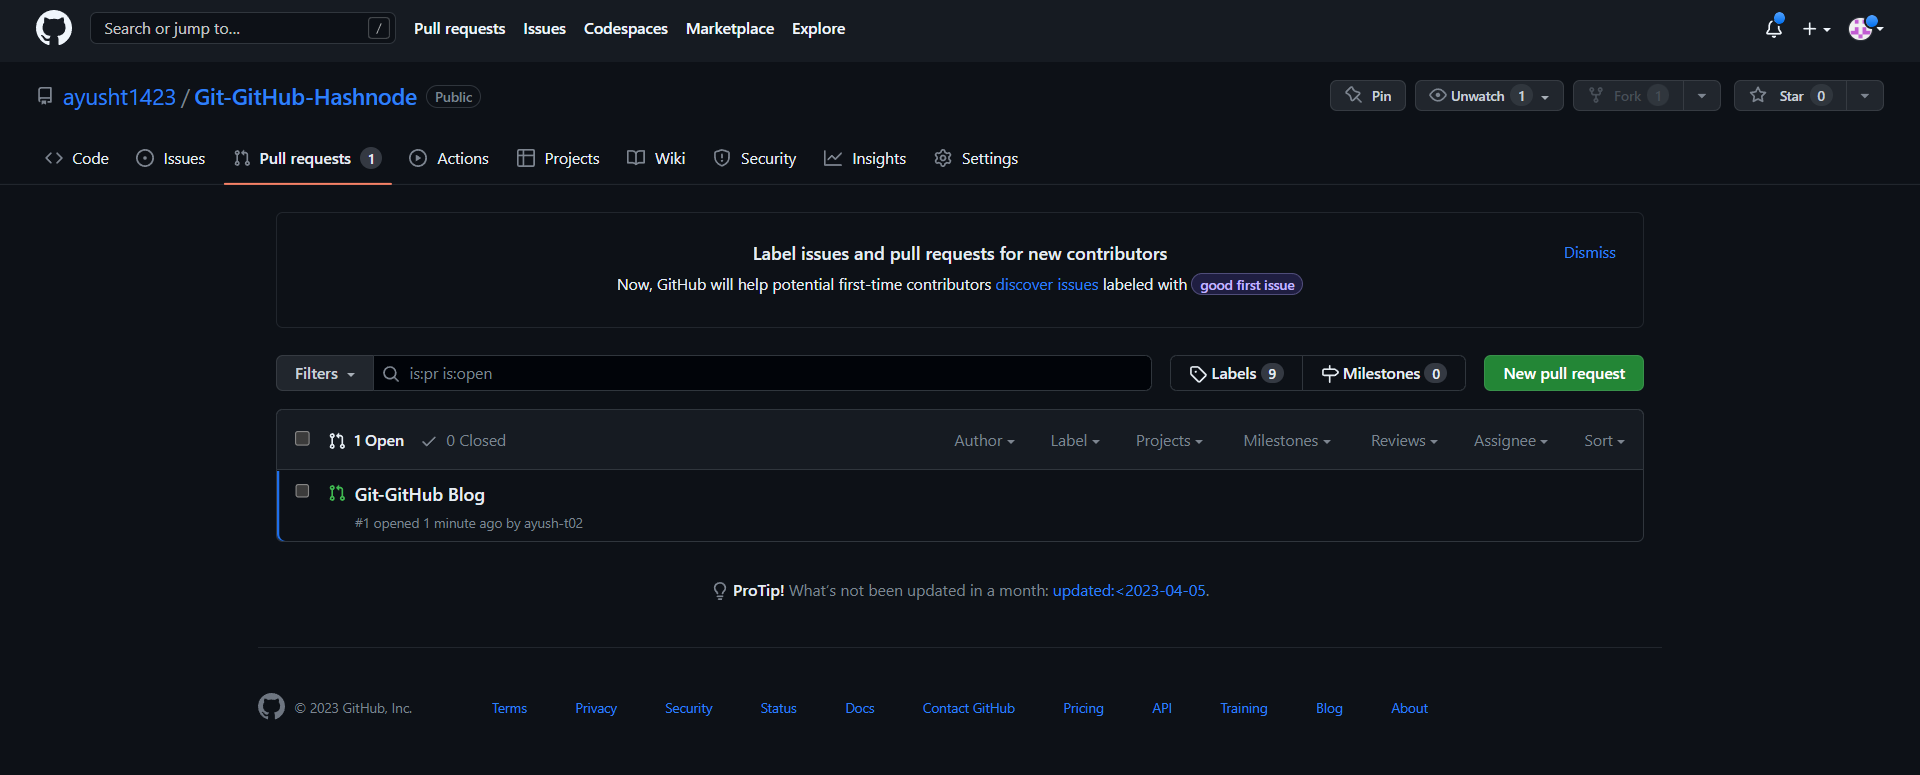
7. Opening a PR
Go to the GitHub page of your forked repository.
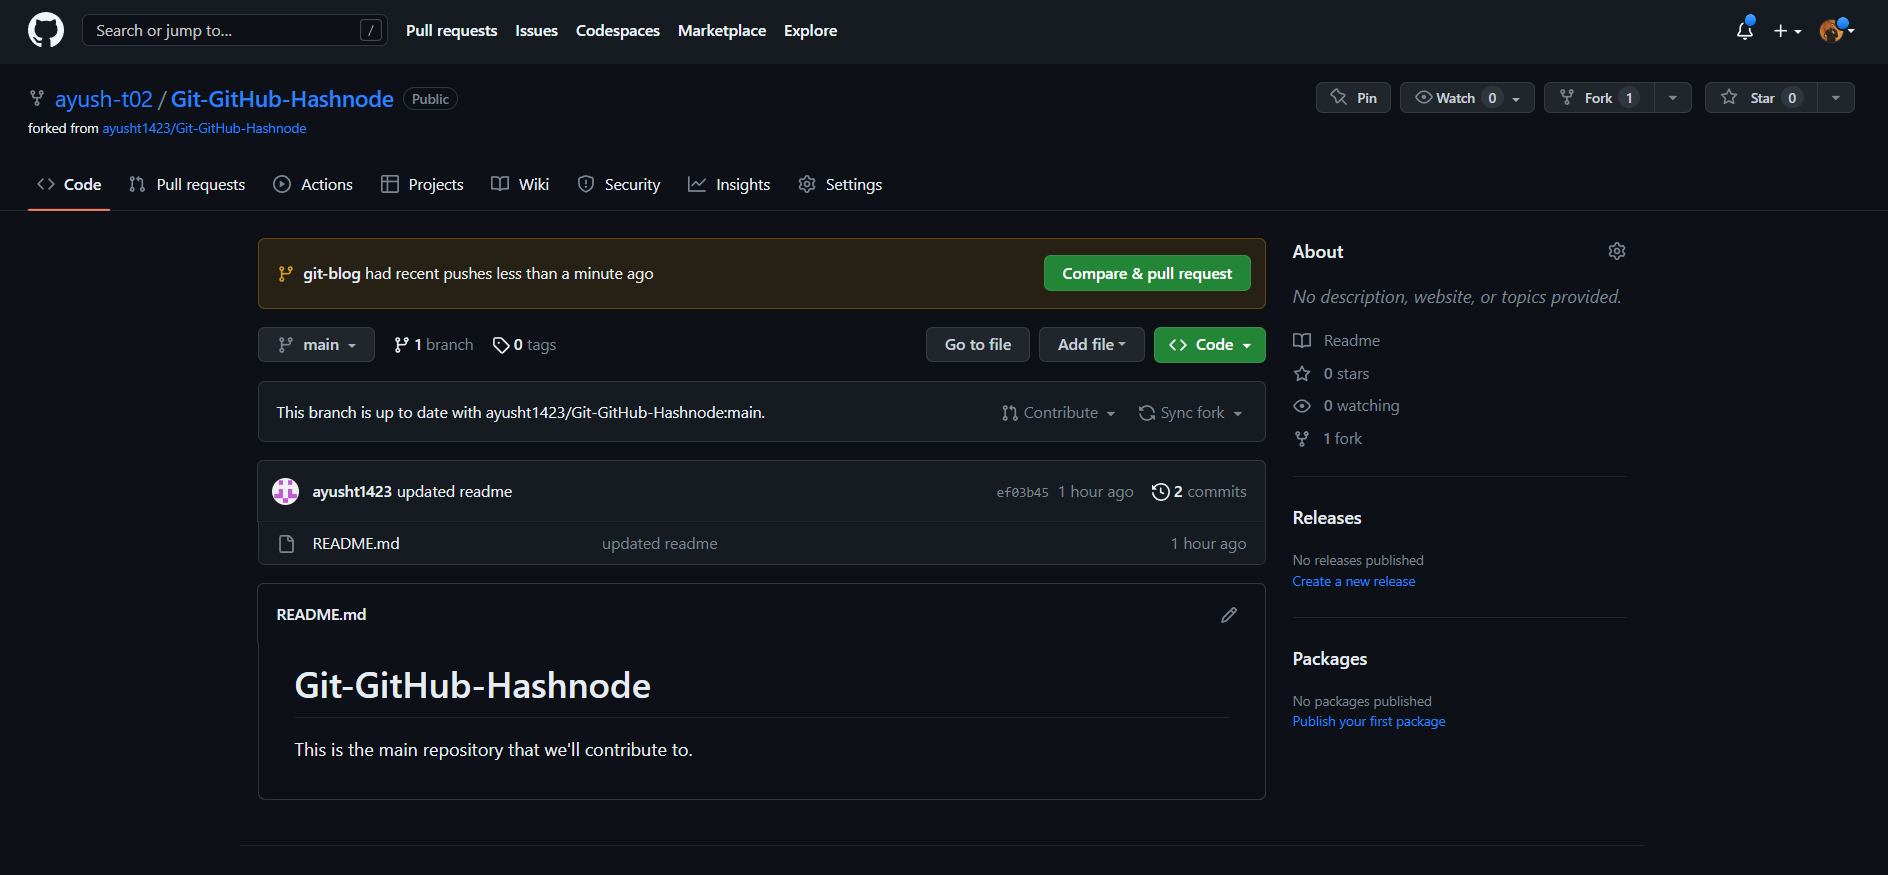
Click on "Compare and pull request" -> "Create pull request"

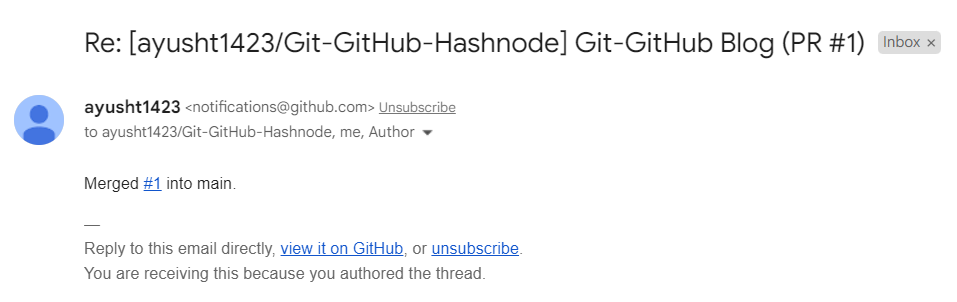
Now you can find your PR in the upstream repository. Then, wait for a comment from the maintainer or merge successful mail.
I have tried to simplify the entire Git-GitHub into a streamlined approach because a lot of developers get confused with multiple commands. As a beginner in open-source, you can follow this exact procedure without any second thoughts. Hope it helped you!
Connect with me on my socials: https://linktr.ee/ayusht02