Build your first Docker Extension
TABLE OF CONTENTS :
Introduction to Docker Extensions.
Prerequisites.
Getting Started.
Building the Extension.
Installing the Extension in the Docker Desktop.
Updating and Rebuilding the Extension.
Open Chrome Dev Tools.
Validate your Extension.
Build the extensions for multiple architectures.
Introduction:
What are Docker Extensions?
Docker Extensions are a way to add new functionality to the Docker Desktop Application.
Developers can easily integrate their preferred development tools into their application development and deployment workflows via extensions.
Communities, Partners, and Individuals can contribute to Docker Desktop by building and publishing their extensions.
It is a way to discover new tools to solve existing problems.
Prerequisites:
To follow along with this tutorial, you'll need
- The latest version of Docker Desktop.
Install the latest version of Docker Desktop.
Getting Started!!
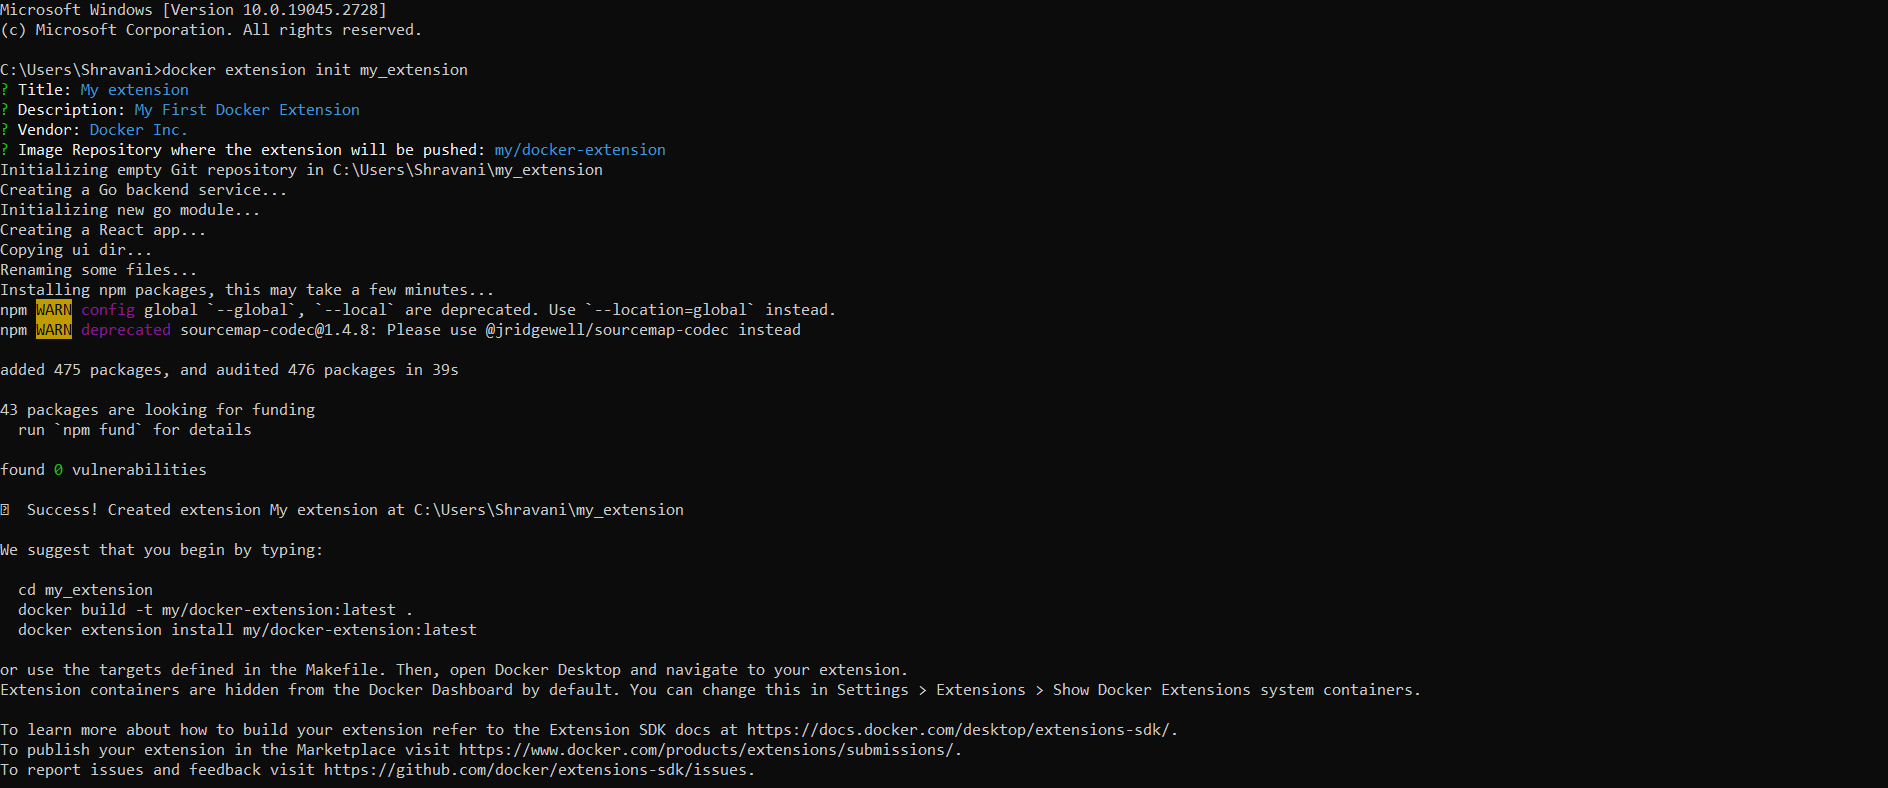
Create the extension file
Type the following command in your CLI to create an extension file.
docker extension init my_extension
A few questions to set up your "my_extension" directory will be asked as you start with this command in your CLI.
cd my_extension
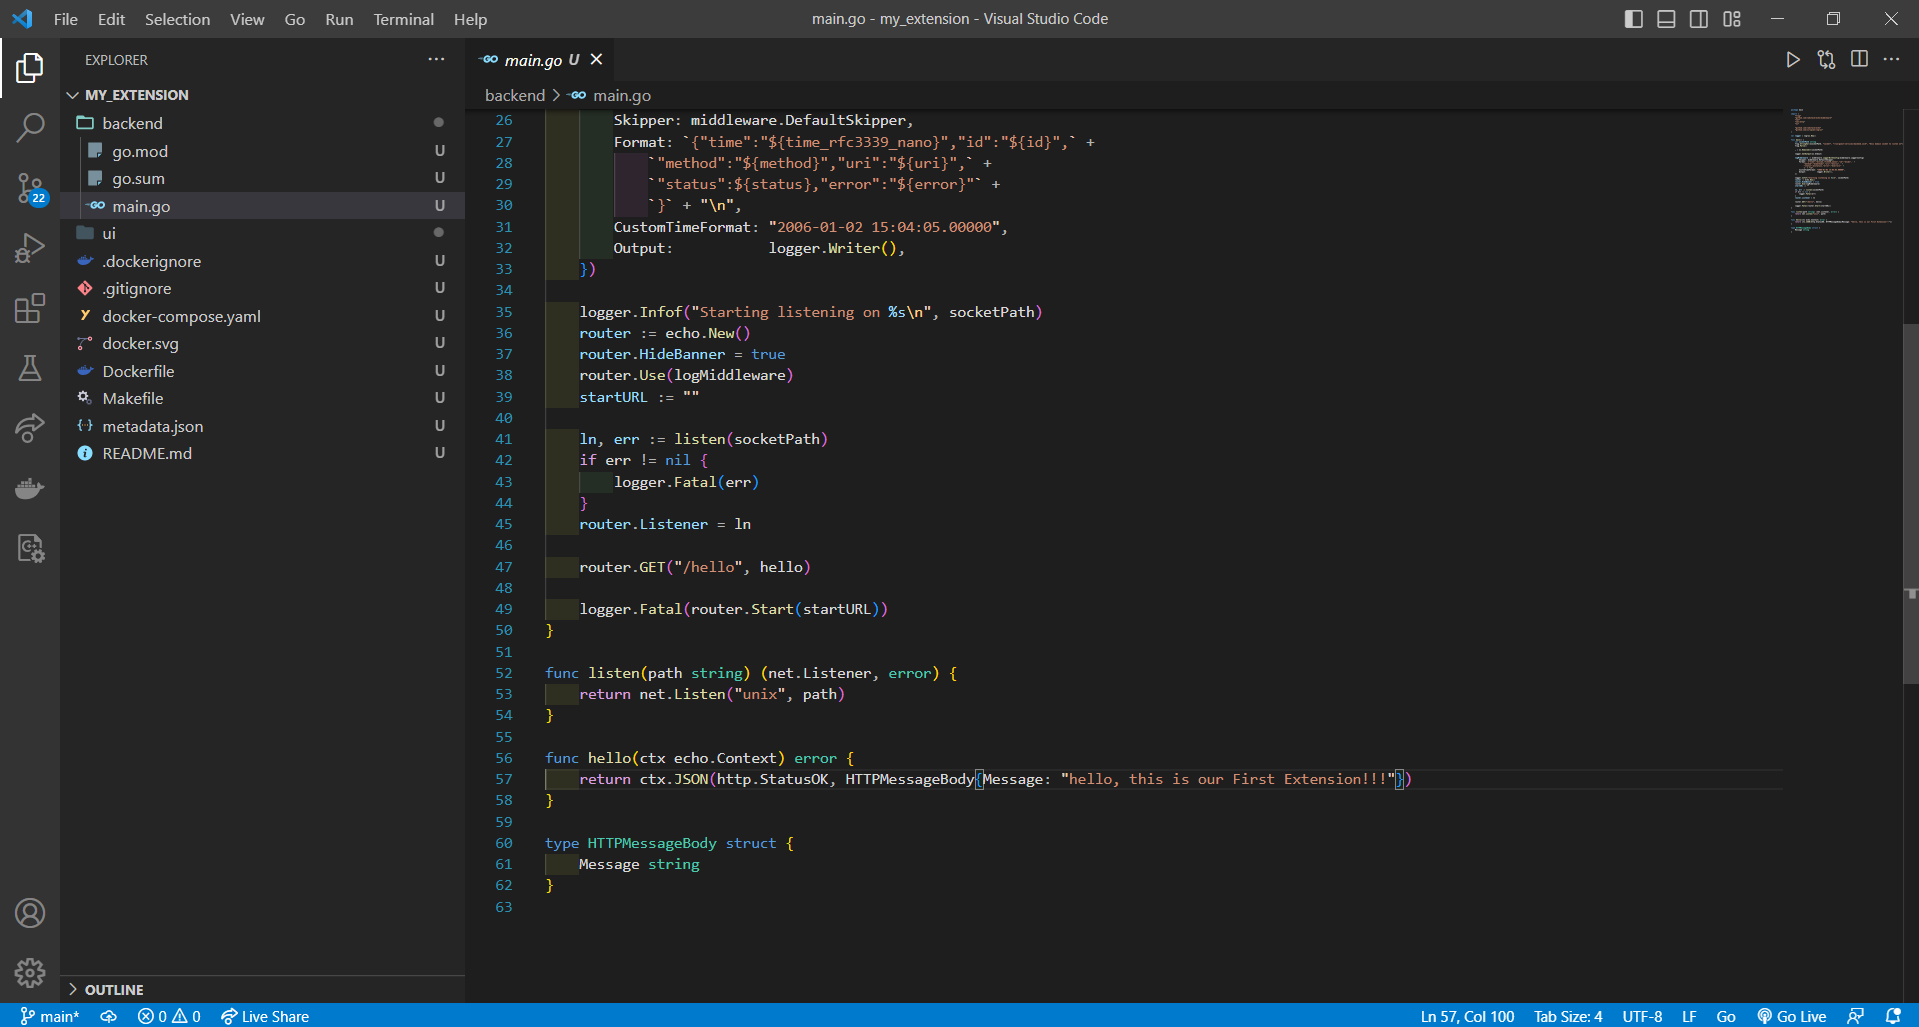
You should be able to see these files in your directory ( I have opened the directory in my VS Code ) recommend you do the same.
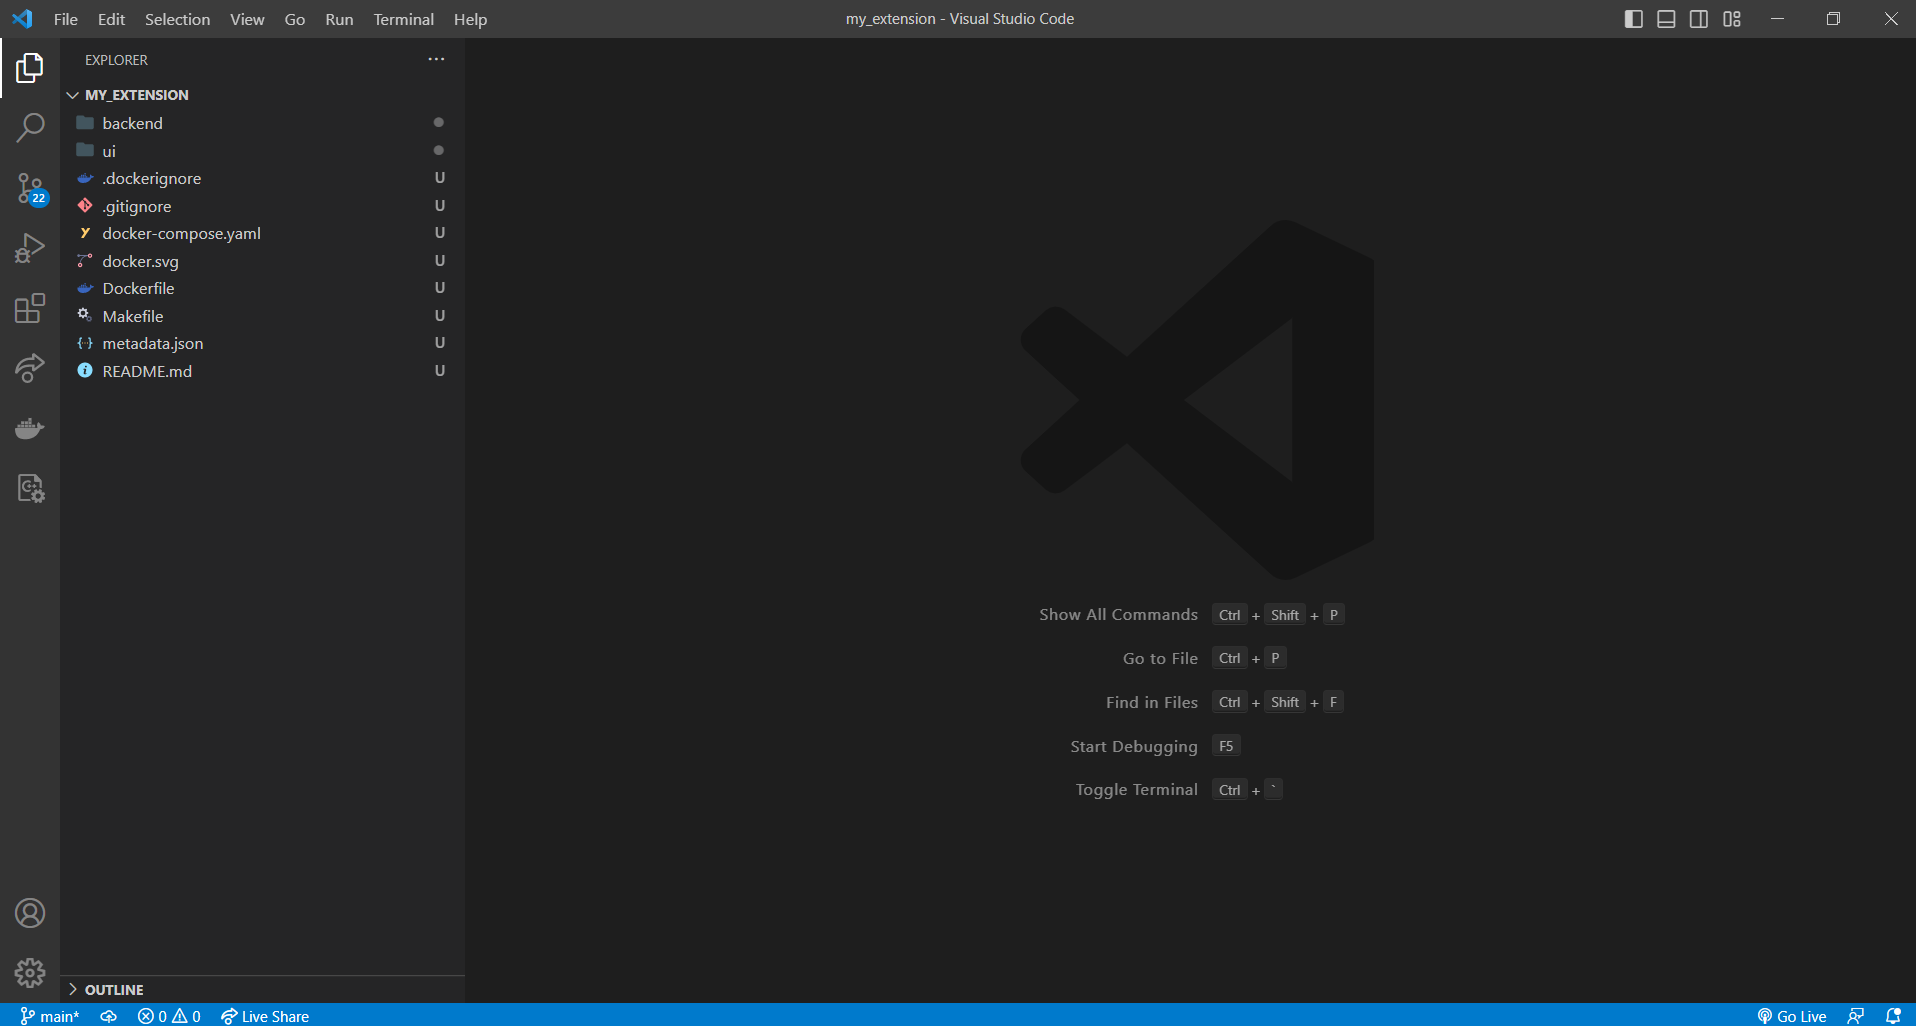
Here, the ui folder contains a react application and the backend folder contains a Go backend service for the application.
Makefile helps you run things locally, ensuring that the environment is exactly what it will be when you run it on your servers. On top of that, it removes the need to install every tool locally and instead allows you to simply run a docker command to have your application running.
Dockerfile is a text file of instructions that are used to automate the installation and configuration of a Docker image.
Docker Compose.yaml is used for running multiple containers as a single service. Each of the containers here runs in isolation but can interact with each other when required. With Compose, you use a YAML file to configure your application's services.
metadata.json contains information about the extension.
Building the Extension
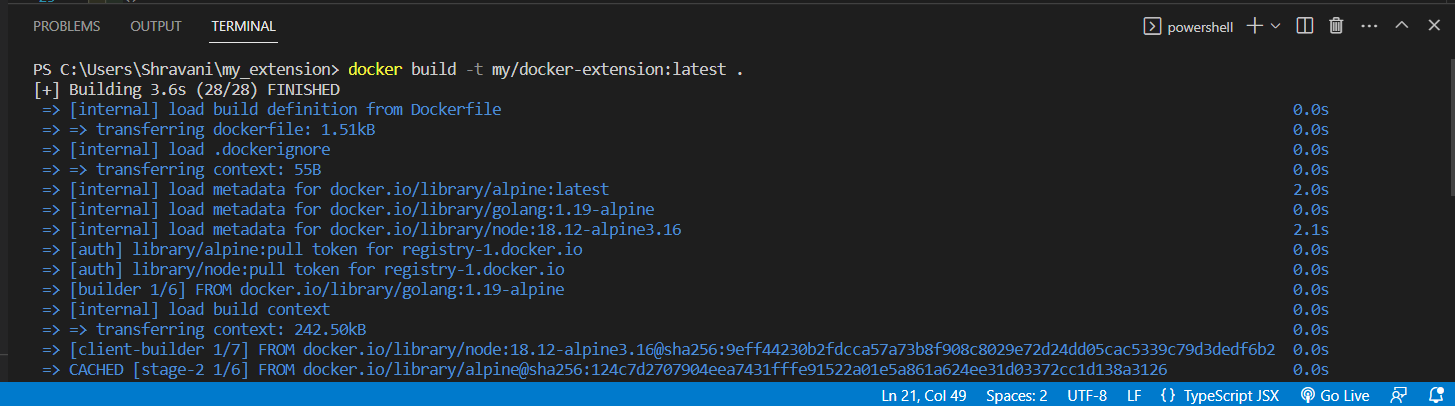
A docker extension is the Docker image, so first let's try to build the extension image.
docker build -t my/docker-extension:latest .
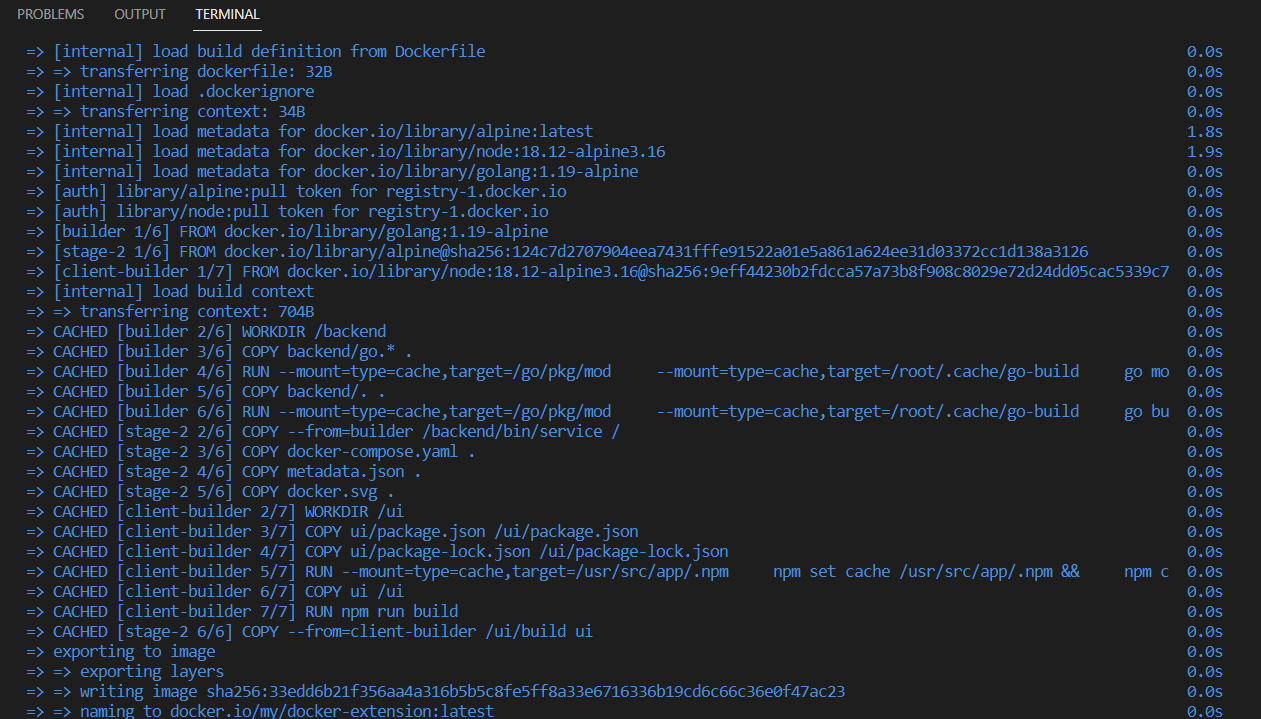
Three steps of a multi-stage Dockerfile are offered while building our extension :
The first builds the backend service, the second the React app, and the third copies the backend binaries and the React components. The backend service is then launched with the CMD command, which uses a socket to watch for requests from the React app.
To build the extension, use either docker build or the preset make build-extension command.
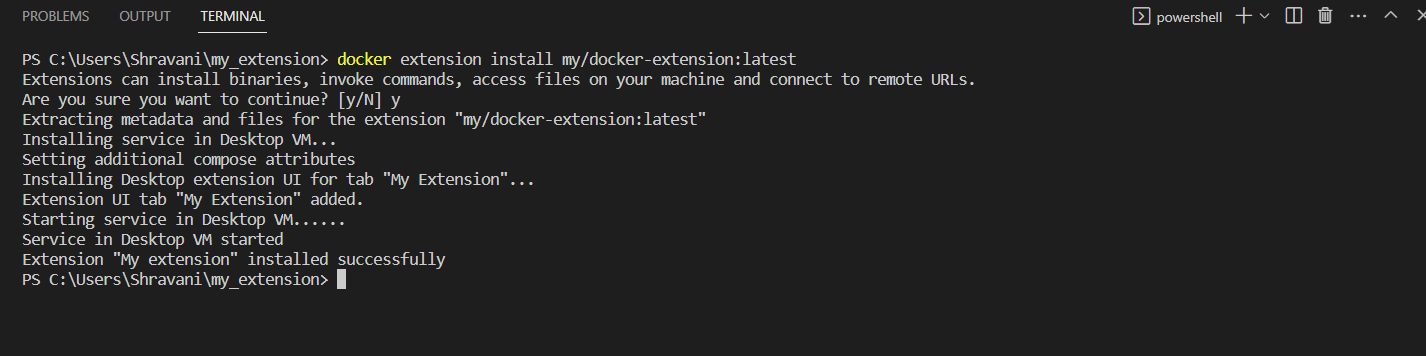
Installing the Extension in the Docker Desktop
docker extension install my/docker-extension:latest
y
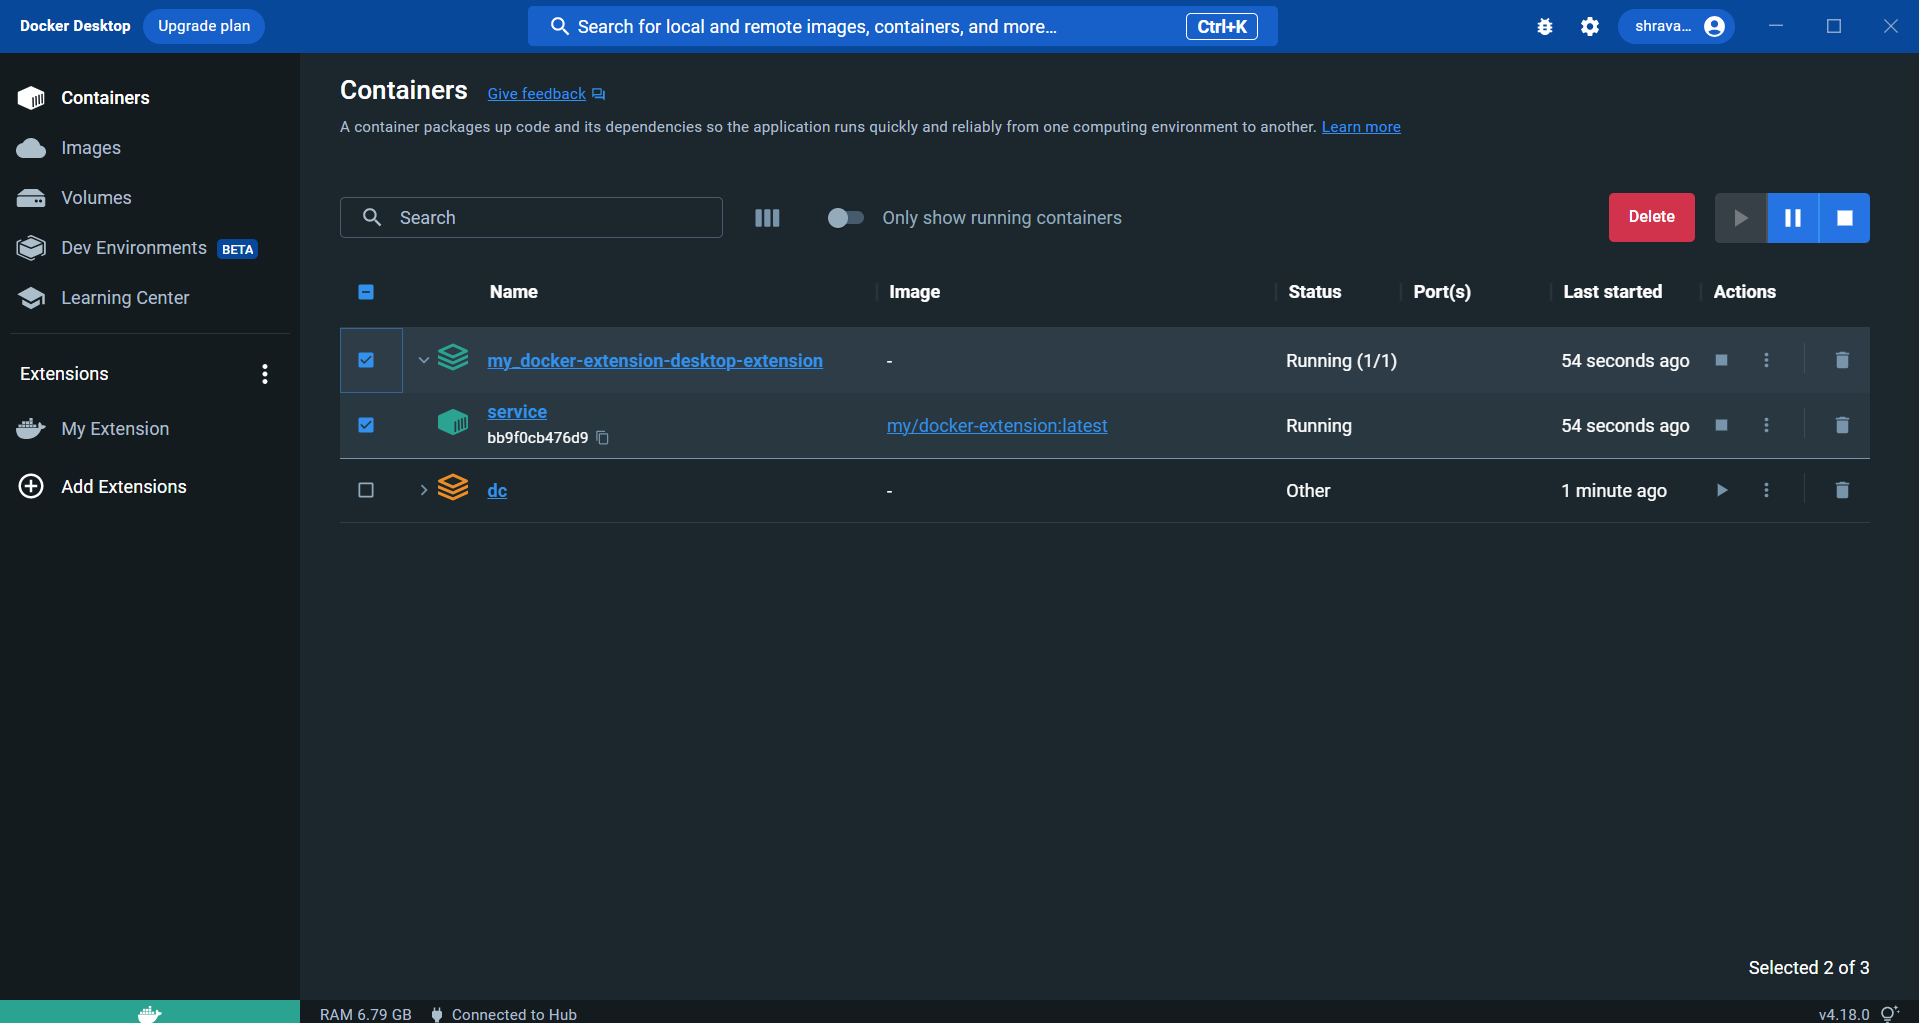
Open your Docker Desktop application, you'll be able to see your Extension named My Extension as well as the container for the Extension.
Click on My Extension
Your very first Extension is ready. Hurraayy!!!
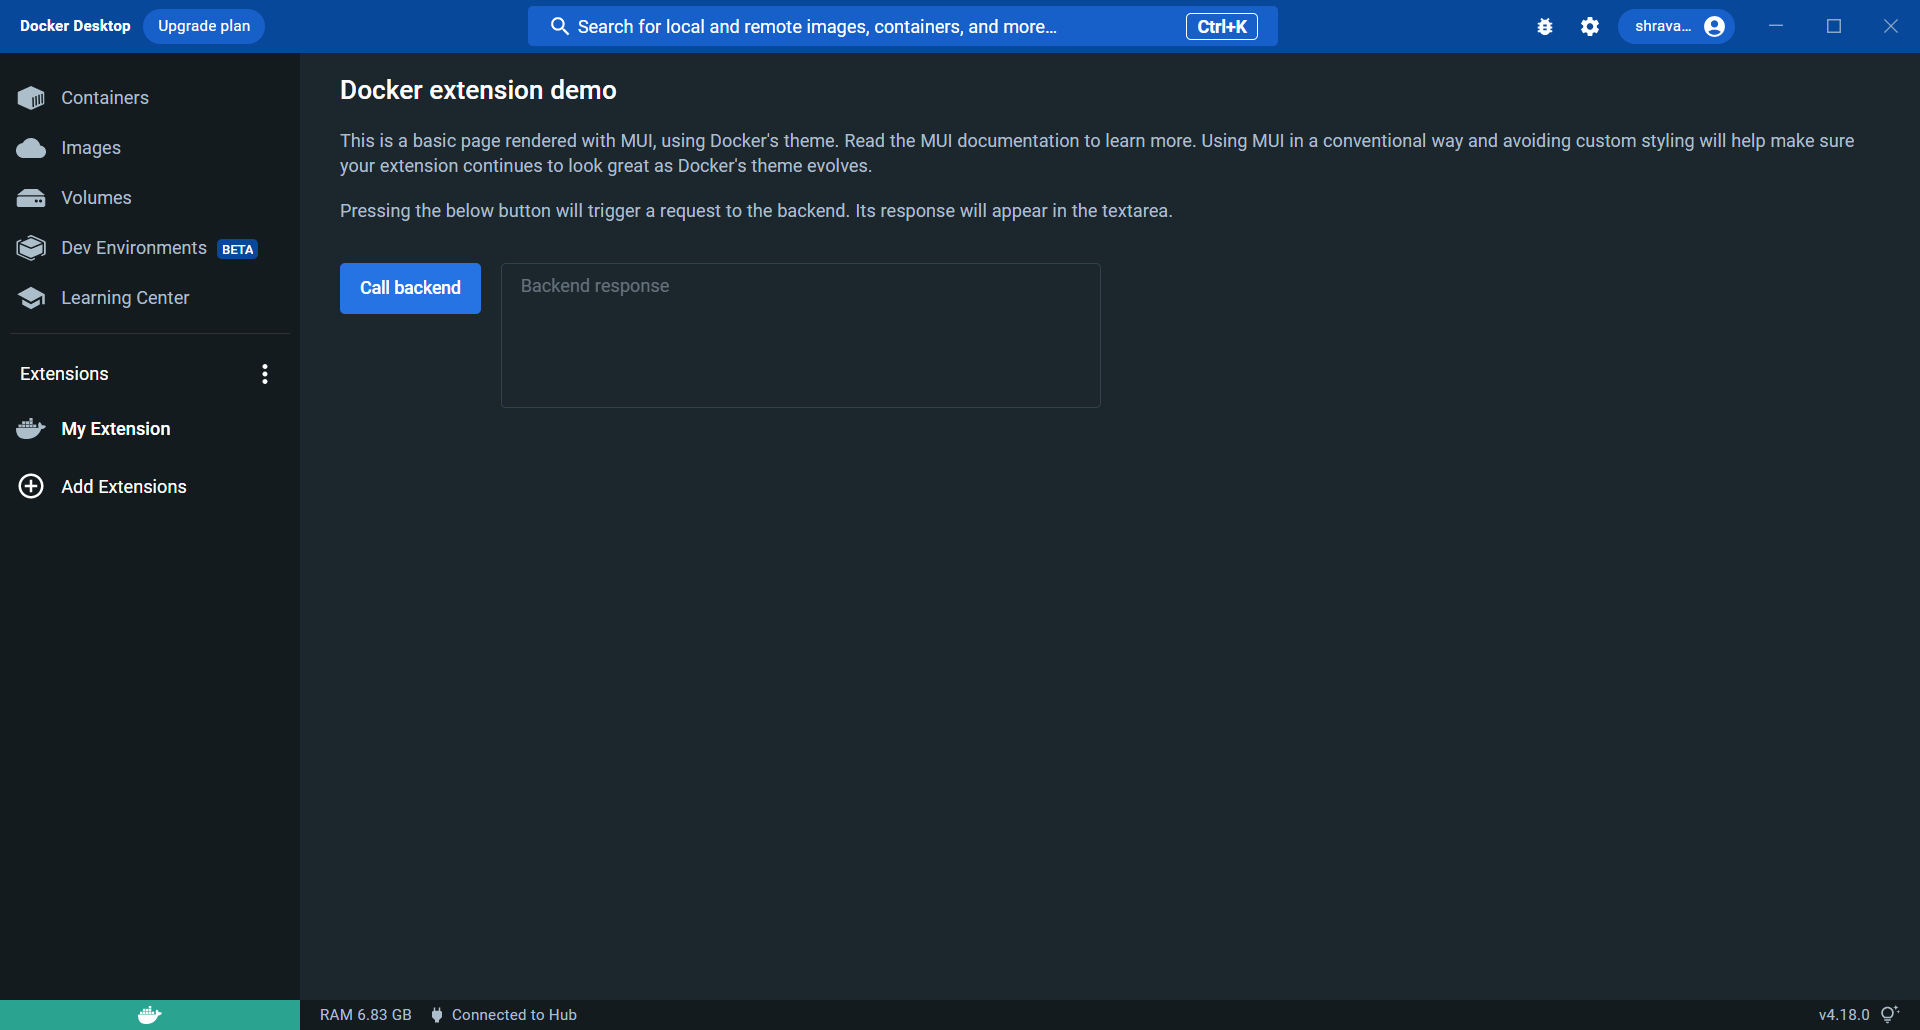
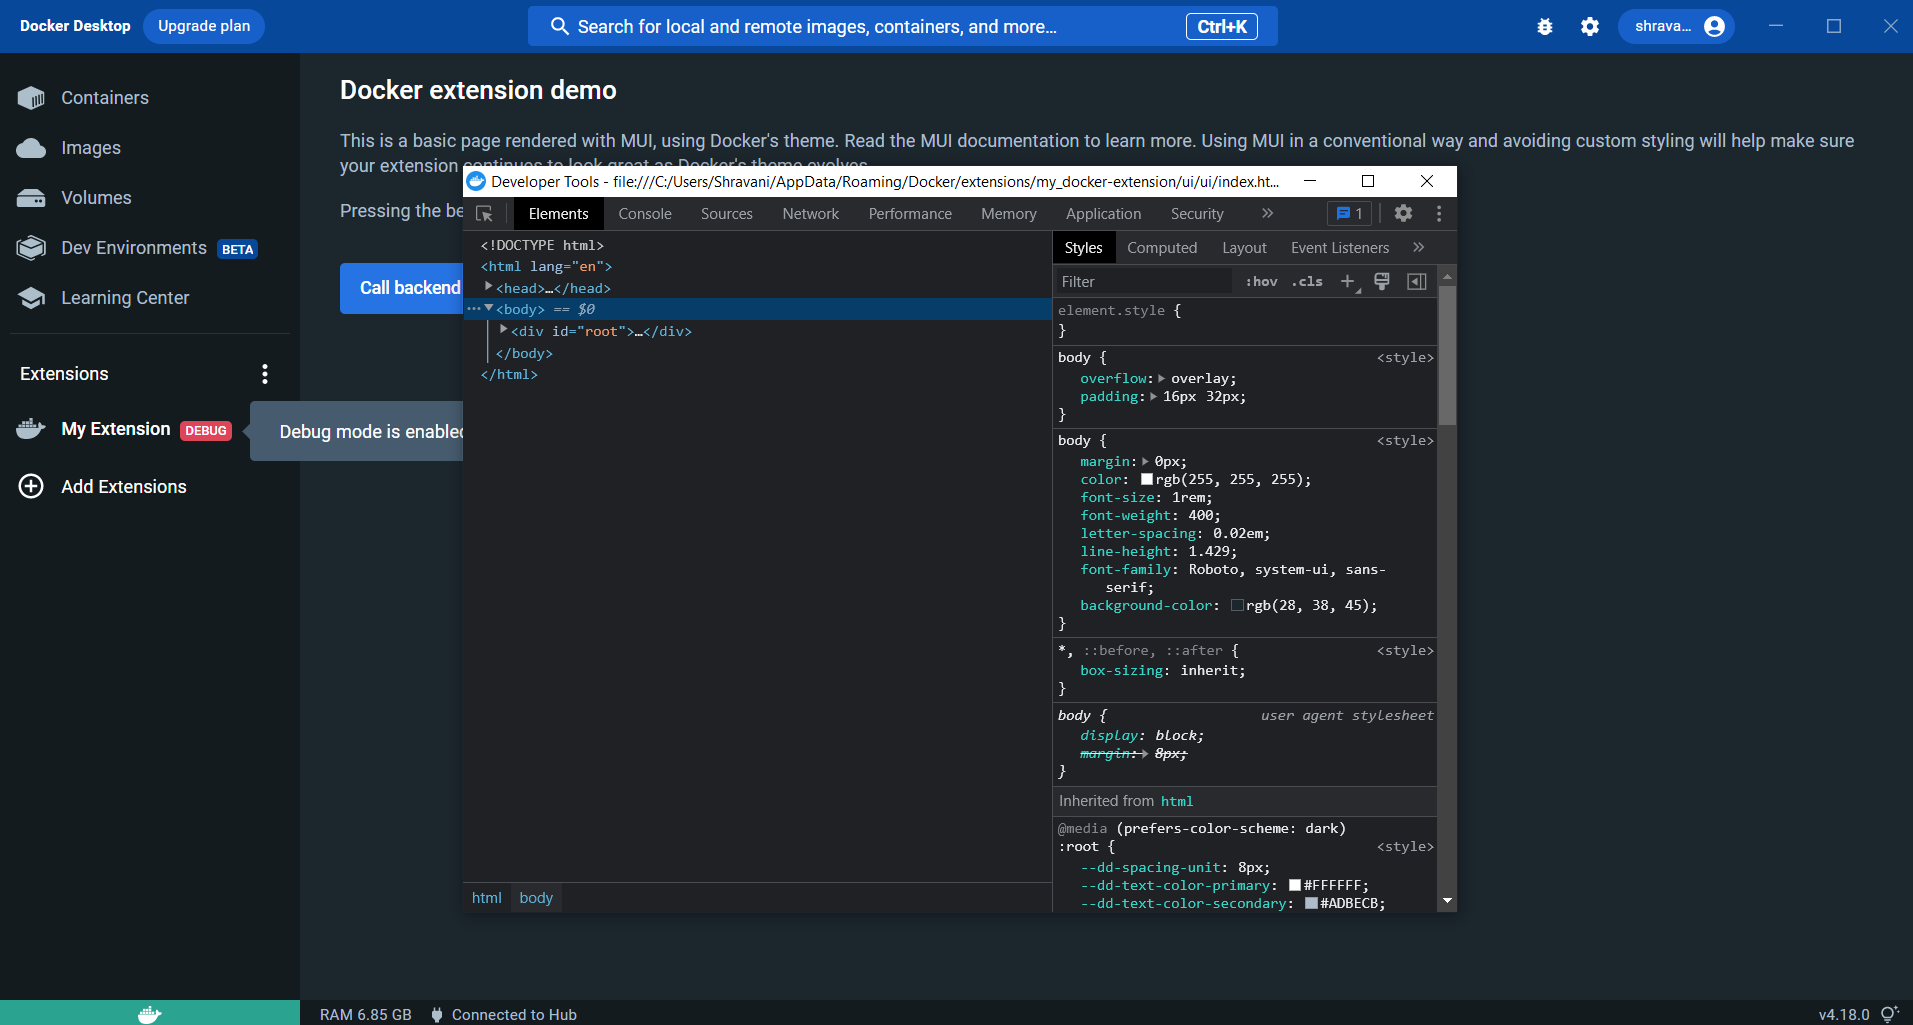
Now click on the Call backend button and you'll be able to see the response from the Backend saying ''hello''.
We can check that the extension has been installed using the following CLI command
docker extension ls
Output:

Updating and Rebuilding the Extension
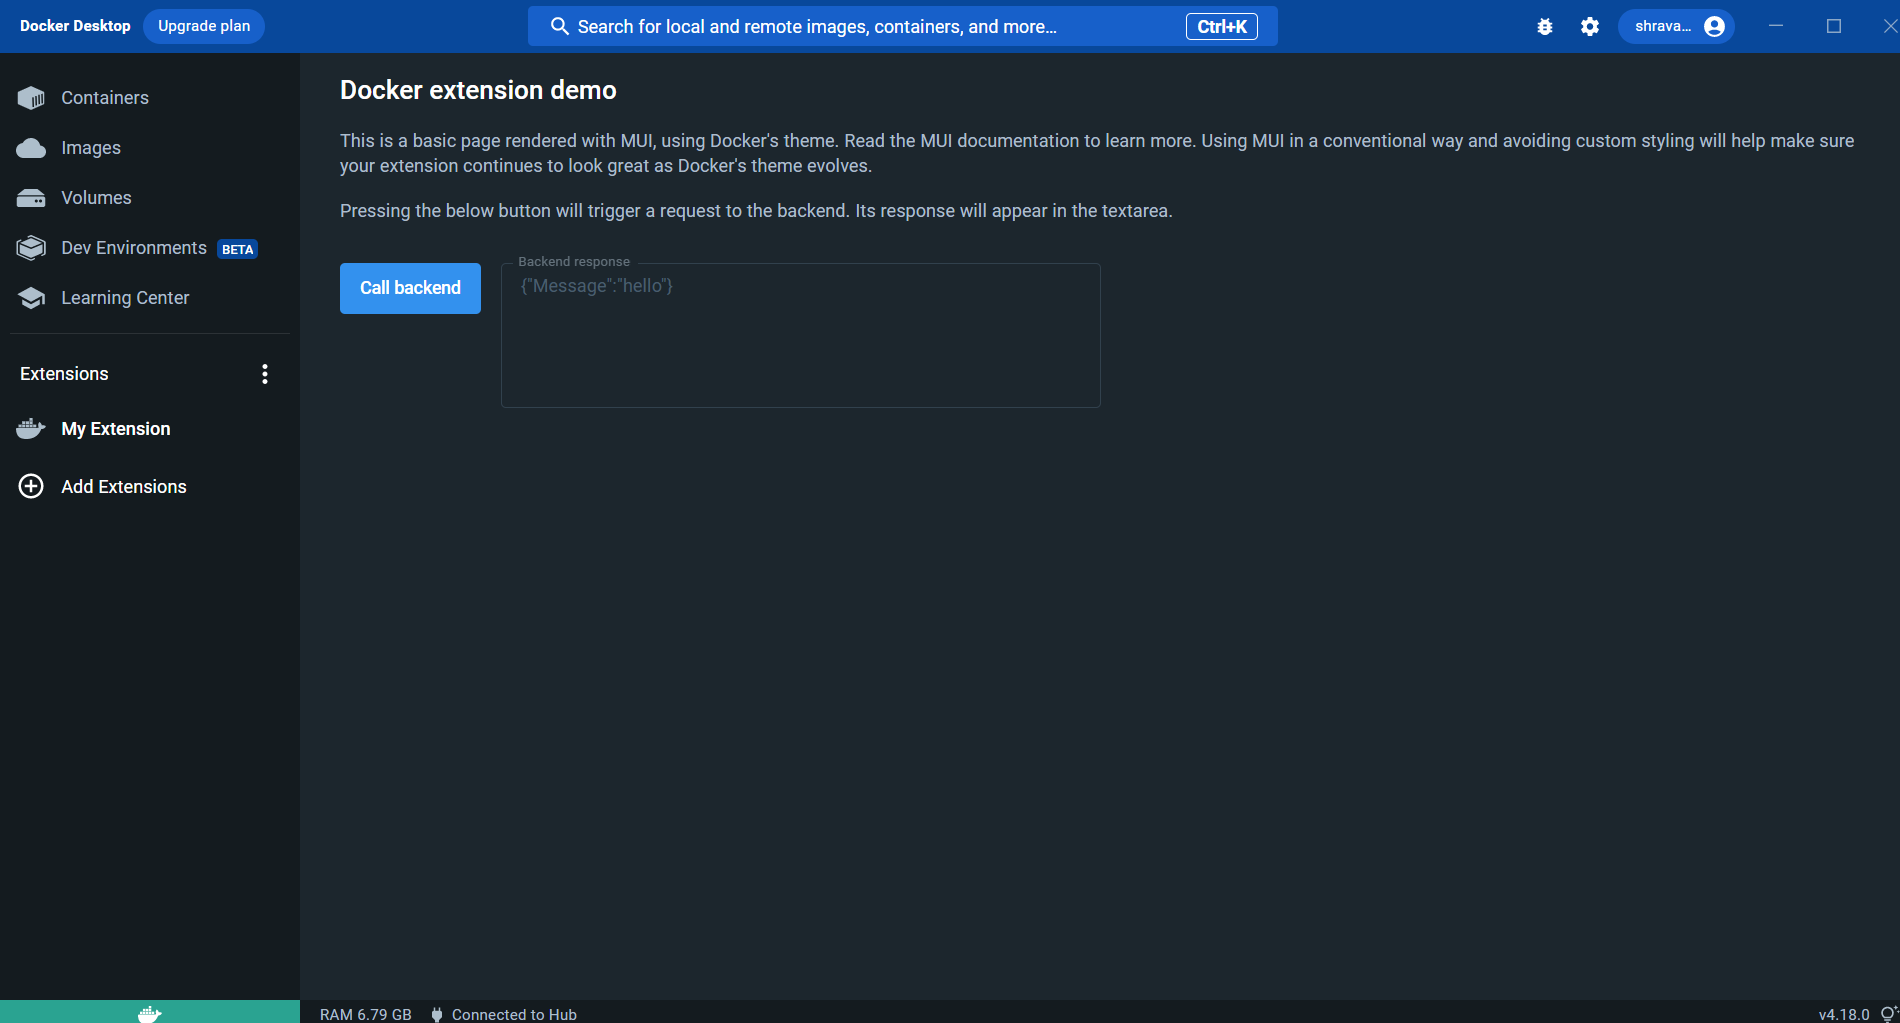
Let's make minor changes to our Code
In the main.go file, we have made the changes in our message from "hello" to "hello, this is our First Extension!!!"
Save the file.
In the App.tsx file,
We have added an Extension UI API (The extension UI API provides a way for the frontend to perform different actions and communicate with the Docker Desktop dashboard or the underlying system.)
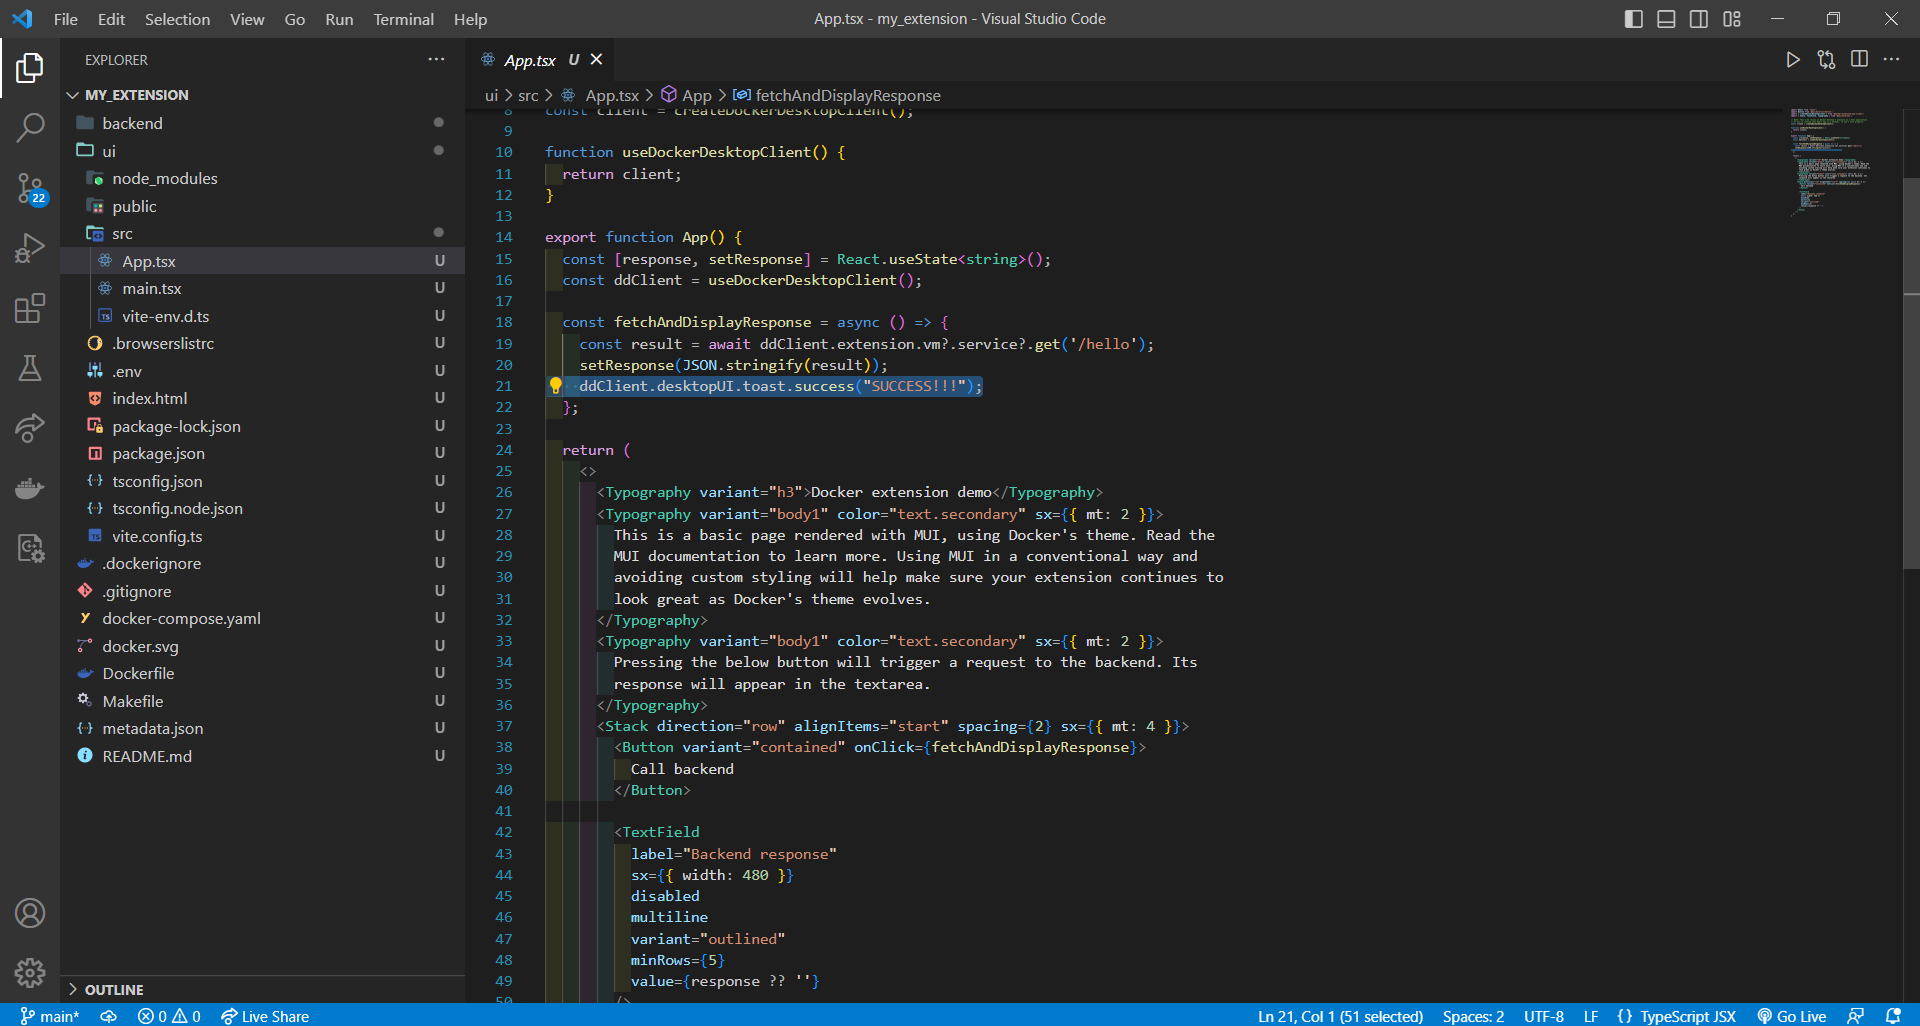
Toasts provide a brief notification to the user. They appear temporarily and shouldn’t interrupt the user experience. They also don’t require user input to disappear.
The Success!!! message will be displayed on the Docker Desktop Dashboard.
Visit https://docs.docker.com/desktop/extensions-sdk/dev/api/dashboard/ for more such toast messages.
Let's build our application again in order to affect the changes that we made in our code.
docker build -t my/docker-extension:latest .
NOTE: After building your application you cannot try to install it again with the same command you used to install your application for the first time as it will throw an error saying the application is already installed.
We need to update our extension :
docker extension update my/docker-extension:latest
y
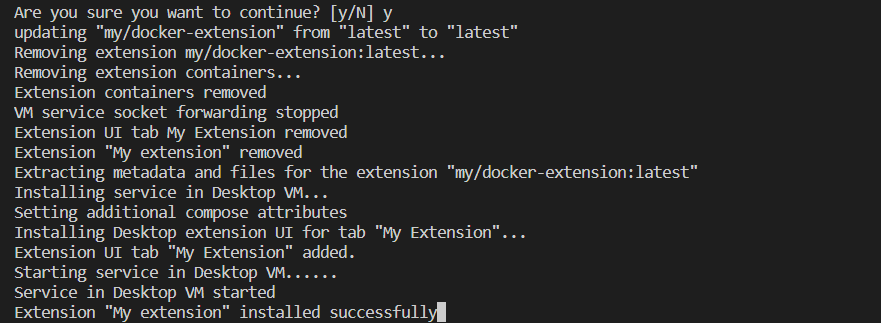

Congrats!! We have successfully updated our Extension...
Open Chrome Dev Tools
In order to open the Chrome Dev Tools for your extension when clicking on the extension tab, run:
docker extension dev debug my/docker-extension:latest

In order to stop the debug mode, use the following command:
docker extension dev reset my/docker-extension:latest

Validate your Extension
Validate your extension before you share or publish it. Validating the extension ensures:
That the extension is built with the image labels it requires to display correctly in the marketplace
That the extension installs and runs without problems
The validation checks if the extension’s
Dockerfilespecifies all the required labels and if the metadata file is valid against the JSON schema file.
To validate your extension, run:
docker extension validate <name-of-your-extension>
If your extension is valid, you will receive the message as:
The extension image "name-of-your-extension" is valid
Build the extensions for multiple architectures
Docker Desktop retrieves the extension image according to the user’s system architecture.
If the extension does not provide an image that matches the user’s system architecture, Docker Desktop is not able to install the extension. As a result, users can’t run the extension in Docker Desktop.
To build the extension for multiple architectures, use the following command
Here the username should be your docker hub username.
docker buildx build --push --platform linux/amd64,linux/arm64 --tag username/my-extension:0.0.1 .

TAKE A LOOK AT THE ERROR MESSAGE...
The issue is that the default driver for docker(which is named docker) does not support multi-architecture builds.
Multi-architecture images are images that can be used on multiple platforms. For example, images that can run on Intel Macs(amd64) and M1 Macs (arm64). You will find this useful, as most users of your images would use them on various platforms.
To solve this create a new builder, using a different driver like docker-container which supports multi-architecture builds.
STEPS FOR CREATING YOUR CUSTOM BUILDER
Create your custom builder by running
docker buildx create --name mycustombuilder --driver docker-container --bootstrap

Ask docker to use this new builder for future builds by running
docker buildx use mycustombuilderInspect buildx to see if docker has indeed switched builders to the new one you asked it to use by running
docker buildx inspect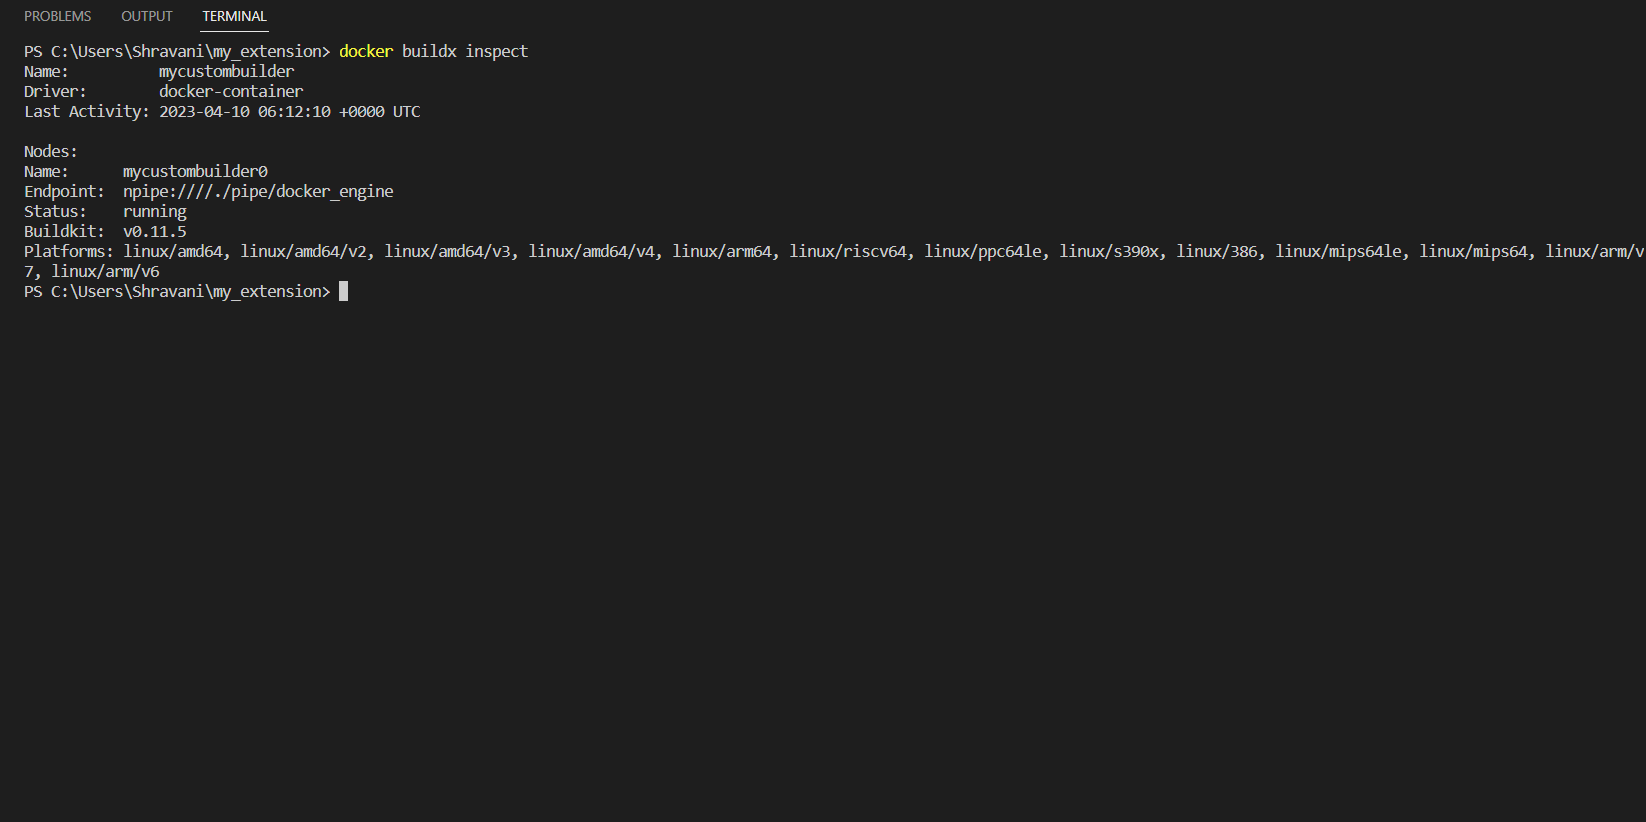
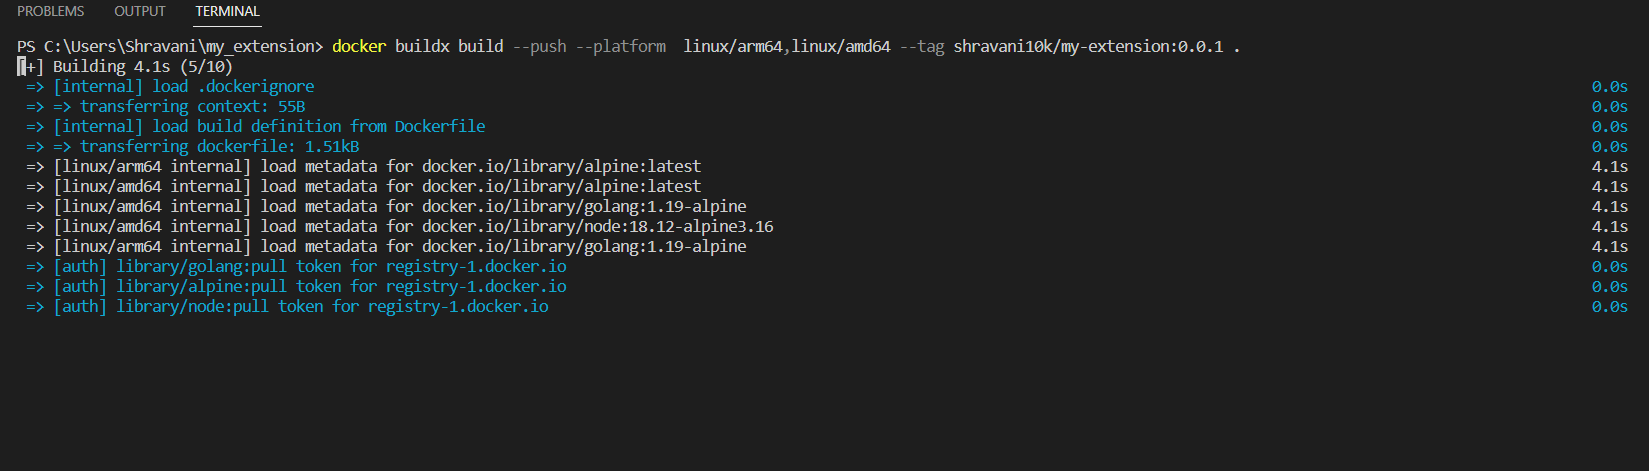
Good! Now you can build extension for multiple architectures by running the following command
DO NOT FORGET TO SPECIFY YOUR DOCKER HUB USERNAME
docker buildx build --push --platform linux/amd64,linux/arm64 --tag username/my-extension:0.0.1 .
Once the build is complete, go to your docker hub account and check the newly pushed image in your repository
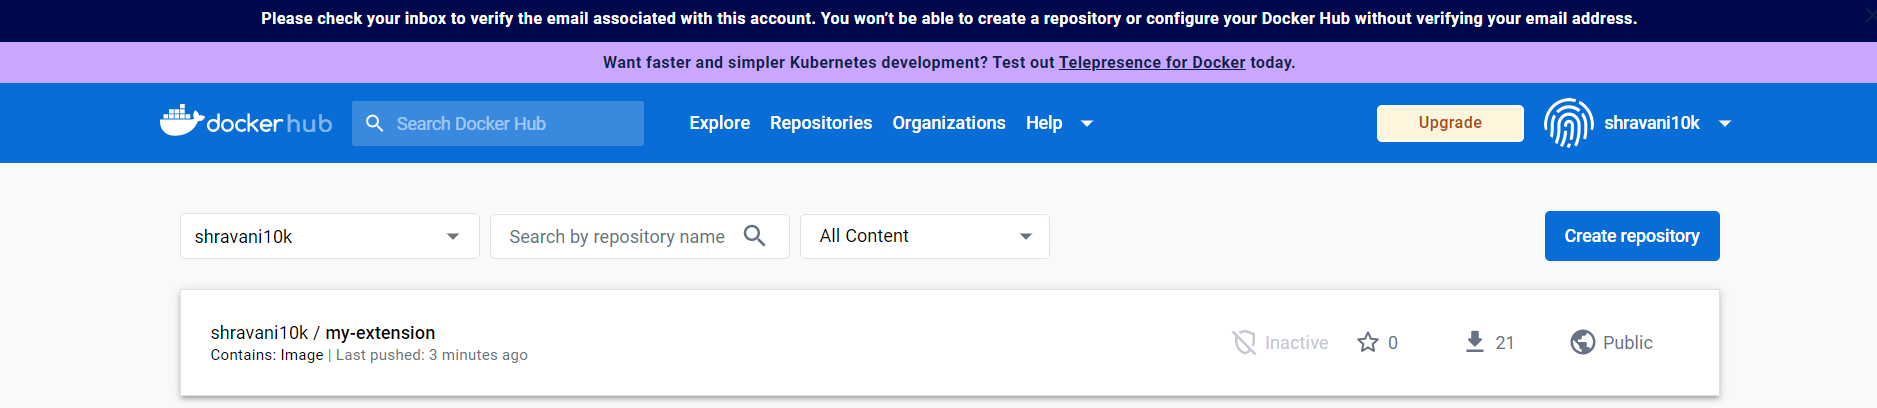
Click on the Image which you pushed recently
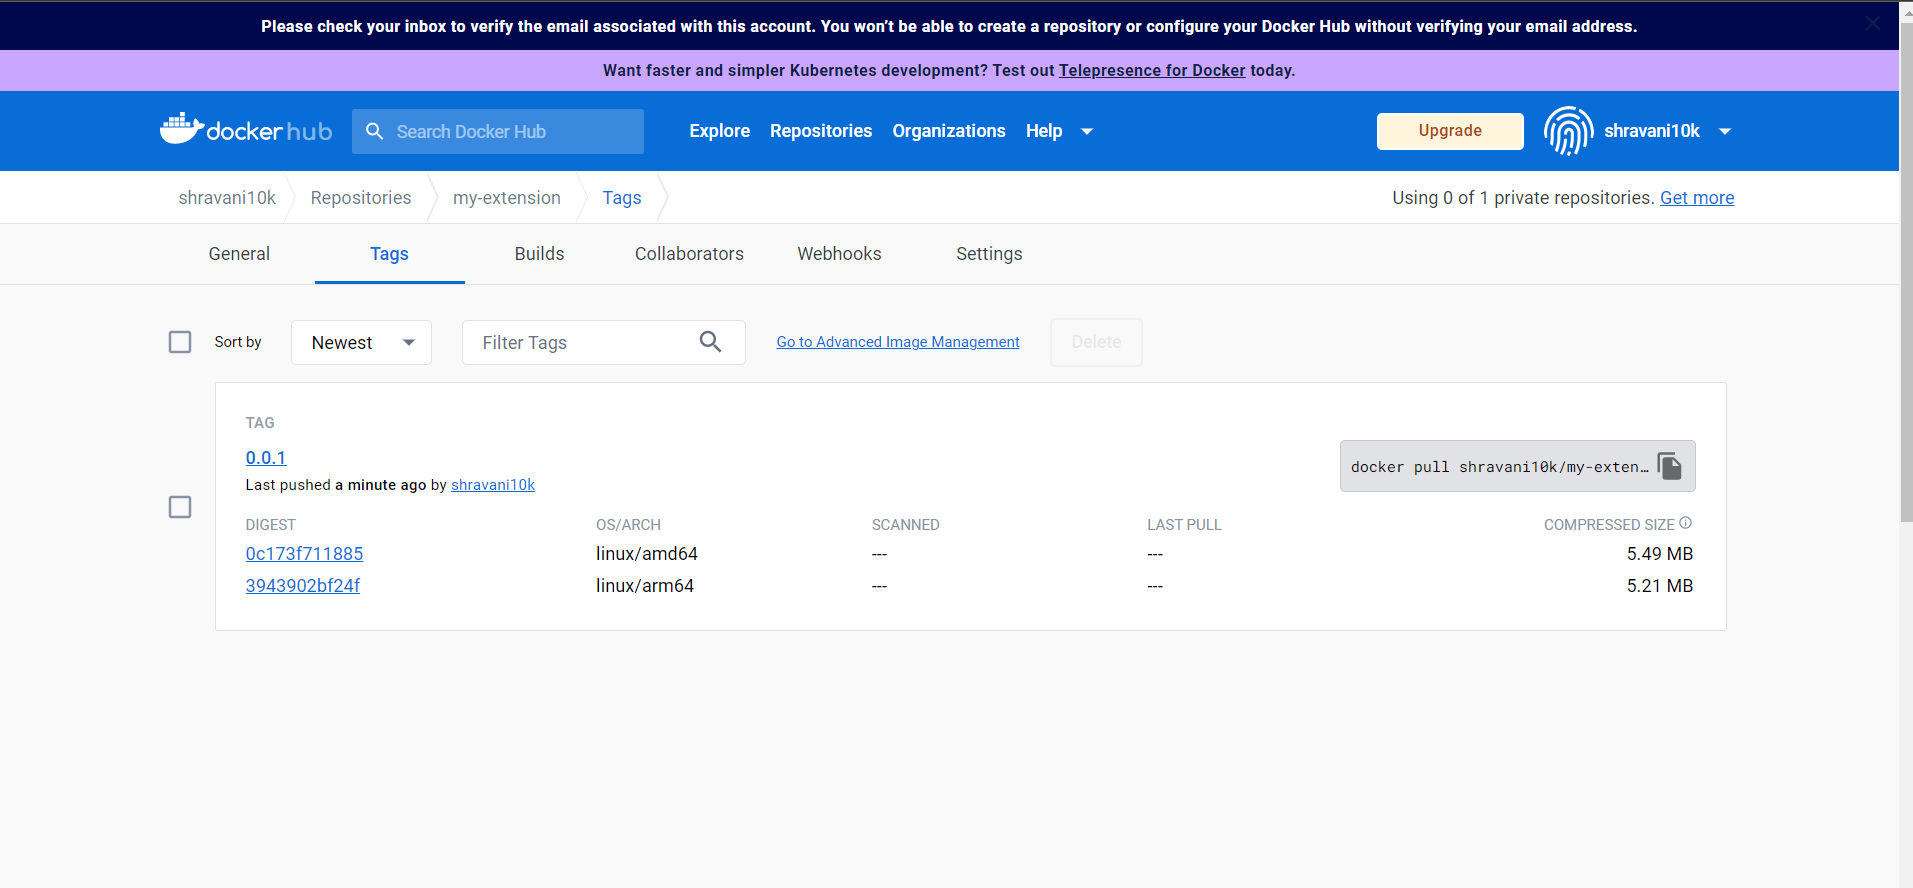
We can now see that the image supports multi-architecture..
THANK YOU FOR READING...