Build a Fullstack Application with Next.js,Tailwind and Database ( MongoDB(or)HarperDB) with Auth(firebase)
Full-Stack Application with Next.js that is Fast, Scalable, and Easy to Maintain.

I Am 16 years old enthusiastic about Web development, Open-source, and Cloud.
Introduction to Next.js
Next.js is a JavaScript framework for building server-rendered or statically-exported React applications. It was developed by the team at Vercel (formerly known as Zeit) and has gained popularity for its simplicity and ease of use.
One of the key benefits of using Next.js is that it allows you to build universal JavaScript applications, which means that the same code can be used on both the client and the server. This can lead to improved performance and a better user experience, as the server can pre-render pages and send them to the client, reducing the amount of work the client has to do.
Overall, Next.js is a powerful and flexible tool for building modern web applications and is well worth considering if you are looking to build a performant, scalable, and deployable app.
Here I am Writing a Few Combinations to Build a Fullstack Application using Next.js With Different databases Try your application architecture And choose Database and follow the section of the database with next.js.
Setting up a Next.js project with Visual Studio Code
To set up a Next.js project with Visual Studio Code (VS Code), you will need to have Node.js and npm (the Node Package Manager) installed on your machine. If you don't already have these tools, you can download them from the Node.js website (https://nodejs.org/) and follow the instructions to install them.
Open VS Code and click
"File > Open Folder"to create a new folder for your project.In the terminal, run the following command to create a new Next.js project using the Next.js
CLI (Command Line Interface):
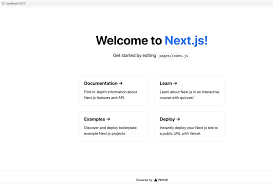
npx create-next-app my-project
This will create a new directory called
"my-project"with the necessary files and dependencies for a Next.js app.Navigate into the new project directory by running the following command:
cd my-projectTo start the development server, run the following command:
npm run devThis will start the development server and open a new browser window with your Next.js app running at
http://localhost:3000. Any changes you make to the
Setting up a Next.js project with GitHub Codespaces: (optional)
Go to https://github.com/ and log in to your account.
Navigate to the repository where you want to create your Next.js project.
Click the
"Code"button and then select"Open in Codespaces"from the dropdown menu.This will open a new Codespaces window with a terminal and code editor.
In the terminal, run the following command to create a new Next.js project using the Next.js CLI (Command Line Interface):
npx create-next-app my-projectThis will create a new directory called "my-project" with the necessary files and dependencies for a Next.js app.
To open the project in VS Code, click the "Open in Visual Studio Code" button in the top menu.
To start the development server from within VS Code, click the "Run" button in the top menu and select "Start Debugging" (or press "F5").
This will start the development server and open a new browser window with your Next.js app running at http://localhost:3000. Any changes you make to the code will be automatically reloaded in the browser.
Setting up a Next.js project with Docker:
Install Docker on your machine by following the instructions at https://docs.docker.com/get-docker/.
Open VS Code and click "File > Open Folder" to create a new folder for your project.
Create a new file called "Dockerfile" in the project directory and add the following lines to it:
 FROM node:14-alpine

 WORKDIR /app

 COPY package.json /app/package.json
 COPY package-lock.json /app/package-lock.json

 RUN npm install

 COPY . /app

 EXPOSE 3000

 CMD ["npm", "run", "dev"]
Create a new file called "docker-compose.yml" in the project directory and add the following lines to it:
 version: '3'
 services:
   app:
     build: .
     ports:
       - "3000:3000"
Run the following command to build the Docker image and start the development server:
docker-compose upThis will start the development server and open a new browser window with your Next.js app running at http://localhost:3000. Any changes you make to the code will be automatically reloaded in the browser.
Next.js Pages
In Next.js, a page is a React component that is exported from a .js, .jsx, .ts, or .tsx file in the "pages" directory. Each page is associated with a route based on its file name. This means that if you have a file called "about.js" in the "pages" directory, it will be accessible at the route "/about".
To create a page in Next.js, you can create a new file in the "pages" directory with a relevant name and export a React component from it. For example, to create an "About" page, you could create a file called "about.js" in the "pages" directory and add the following code to it:
import React from 'react';

const About = () => {
  return (
    <div>
      <h1>About</h1>
      <p>This is an about page.</p>
    </div>
  );
};

export default About;
This will create a page at the route "/about" that displays an "About" heading and some text. You can add more content or functionality to the page as needed.
To navigate between pages in your Next.js app, you can use the Link component provided by Next.js. For example, you could add a link to the "About" page in the header of your app like this:
import Link from 'next/link';

const Header = () => {
  return (
    <header>
      <Link href="/about">
        <a>About</a>
      </Link>
    </header>
  );
};

export default Header;
This will create a link that navigates to the "/about" route when clicked. You can add more links to your app as needed by creating more pages and adding them to the "pages" directory.
Routing in Next.js
Routing in Next.js is the process of mapping URLs to specific pages or functionality in your app. Next.js offers a few different ways to handle routing, each with its benefits and trade-offs.
Automatic routing: The most basic way to handle routing in Next.js is to use automatic routing. This means that Next.js will automatically create a route for each page in your
"pages"a directory based on the file name. For example, if you have a file called"about.js"in the "pages" directory, it will be accessible at the route"/about".Custom routes: If you need more control over your routes, you can use custom routes. This allows you to specify custom routes and map them to specific pages or functionality in your app.
To use custom routes, you can create a
"routes.js"file in the root of your project and define your routes using theRoutesandRoutecomponents provided by Next.js.import { Routes, Route } from 'next-routes'; const routes = new Routes(); routes .add('home', '/') .add('about', '/about') .add('blog', '/blog/:slug', 'blog') .add('product', '/product/:id', 'product'); export default routes;This will create four routes: "/", "/about", "/blog/:slug", and "/product/:id". You can then use the
Linkcomponent provided by Next.js to navigate between these routes in your app.import Link from 'next/link'; import routes from '../routes'; const Header = () => { return ( <header> <Link href={routes.home()}> <a>Home</a> </Link> <Link href={routes.about()}> <a>About</a> </Link> <Link href={routes.blog({ slug: 'my-first-post' })}> <a>Blog</a> </Link> <Link href={routes.product({ id: 123 })}> <a>Product</a> </Link> </header> ); }; export default Header;To use dynamic routing, you can create a file in the "pages" directory with a name that includes a placeholder, such as "blog/[slug].js". This will create a route that matches any URL that starts with "/blog/", with the remainder of the URL being passed as a parameter.
 import { useRouter } from 'next/router';

 const BlogPost = () => {
   const router = useRouter();
   const { slug } = router.query;

   return (
     <div>
       <h1>Blog post: {slug}</h1>
       <p>This is a blog post with a dynamic URL.</p>
     </div>
   );
 };

 export default BlogPost;
This will create a page that can handle any URL that starts with
"/blog/", with the remainder of the URL being passed as the "slug" parameter. You can then use this parameter to retrieve the appropriate blog post from your database or API and display it on the page.
Built-In CSS Support in Next.js
Global styles: To apply styles globally to your entire app, you can create a file called "styles.css" in the "public" directory and import it in the "_app.js" file in the "pages" directory. This will make the styles available to all pages in your app.
 import '../public/styles.css';

 const MyApp = ({ Component, pageProps }) => {
   return <Component {...pageProps} />;
 };

 export default MyApp;
Component-level styles: To apply styles to a specific component, you can use the
styleprop. This allows you to specify inline styles for a component, which can be useful for small, self-contained components.const MyComponent = () => { return ( <div style={{ color: 'red' }}> This text is red </div> ); };CSS Modules: To apply styles to a specific component and avoid conflicts with other styles in your app, you can use CSS Modules. This allows you to import a CSS file and use it to style a specific component, with the class names being automatically scoped to that component.
To use CSS Modules, you will need to install the
@zeit/next-cssandcss-loaderpackages and add them to your Next.js configuration file. Then, you can create a CSS file for a specific component and import it in the component file.// next.config.js const withCSS = require('@zeit/next-css'); module.exports = withCSS({ cssLoaderOptions: { modules: { localIdentName: '[local]___[hash:base64:5]', }, }, }); // MyComponent.module.css .red { color: red; } // MyComponent.js import styles from './MyComponent.module.css'; const MyComponent = () => { return ( <div className={styles.red}> This text is red </div> ); };
Tailwind CSS with Next.js
Tailwind CSS is a popular utility-first CSS framework that allows you to create custom styles by composing classes based on a set of predefined styles. You can use Tailwind CSS with Next.js to style your app
Install the Tailwind CSS package by running the following command in your project's root directory:
npm install tailwindcssCreate a configuration file for Tailwind CSS by running the following command:
npx tailwindcss initCreate a CSS file in your project and import the Tailwind CSS styles. You can do this by adding the following code to the file:
 @import 'tailwindcss/base';
 @import 'tailwindcss/components';
 @import 'tailwindcss/utilities';
Next, you need to configure Next.js to use the CSS file you just created. To do this, you will need to install the
@zeit/next-cssandcss-loaderpackages and add them to your Next.js configuration file.// next.config.js const withCSS = require('@zeit/next-css'); module.exports = withCSS({});Finally, you can import the CSS file in your app and start using Tailwind CSS classes to style your components. For example, you could create a button component like this:
 import styles from './Button.css';

 const Button = ({ children }) => {
   return (
     <button className={styles.button}>
       {children}
     </button>
   );
 };

 export default Button;
You can then use the
Buttonthe component in your app and apply Tailwind CSS styles to it using theclassNameimport Button from './Button'; const App = () => { return ( <div> <Button className="bg-blue-500 text-white font-bold py-2 px-4 rounded-full"> Click me </Button> </div> ); }; export default App;
you can use Tailwind CSS with Next.js by installing the Tailwind CSS package, creating a configuration file, creating a CSS file, configuring Next.js to use the CSS file, and then importing the CSS file in your app and using Tailwind CSS classes to style your components. This allows you to easily apply custom styles to your app using the utility-first approach provided by Tailwind CSS.
Mongo DB with Next.js
MongoDB is a popular NoSQL database that you can use with Next.js to store and retrieve data for your app. To use MongoDB with Next.js
Install the MongoDB driver for Node.js by running the following command in your project's root directory:
npm install mongodbNext, you will need to connect to a MongoDB server. You can do this by creating a file called "db.js" in your project and adding the following code to it:
import MongoClient from 'mongodb';

const uri = 'mongodb+srv://<username>:<password>@cluster0.mongodb.net/test?retryWrites=true&w=majority';

const client = new MongoClient(uri, {
  useNewUrlParser: true,
  useUnifiedTopology: true,
});

export default client;
Replace <username> and <password> with your MongoDB username and password.
Next, you can create a function to connect to the MongoDB server and perform operations on the database. You can do this by adding the following code to the "db.js" file:
 import MongoClient from 'mongodb';

 const uri = 'mongodb+srv://<username>:<password>@cluster0.mongodb.net/test?retryWrites=true&w=majority';

 const client = new MongoClient(uri, {
   useNewUrlParser: true,
   useUnifiedTopology: true,
 });

 const connect = async () => {
   try {
     await client.connect();
     console.log('Connected to MongoDB');
   } catch (error) {
     console.log(error);
   }
 };

 export { client, connect };
You can now use the
connectfunction to connect to the MongoDB server and perform operations on the database. For example, you could create a function to insert a new document into a collection like this:import { client, connect } from './db'; const insertDocument = async (collection, document) => { try { await connect(); const result = await client.db('test').collection(collection).insertOne(document); console.log(`Inserted ${result.insertedCount} document(s) into the ${collection} collection`); } catch (error) { console.log(error); } }; export { insertDocument };You can then use the
insertDocumentfunction to insert aimport { insertDocument } from './db'; const document = { name: 'John', age: 30, }; insertDocument('users', document);his will insert a new document into the "users" collection with the name and age fields.
You can also create functions to retrieve documents from the database or perform other operations, such as updating or deleting documents. For example, you could create a function to find all documents in a collection like this:
import { client, connect } from './db';

const findDocuments = async (collection) => {
  try {
    await connect();
    const result = await client.db('test').collection(collection).find({}).toArray();
    console.log(result);
  } catch (error) {
    console.log(error);
  }
};

export { findDocuments };
You can then use the findDocuments function to retrieve all documents from the "users" collection:
import { findDocuments } from './db';

findDocuments('users');
you can use MongoDB with Next.js by installing the MongoDB driver for Node.js, connecting to a MongoDB server, and performing operations on the database using functions.
HarperDB with Next.js
HarperDB is a scalable, high-performance database that you can use with Next.js to store and retrieve data for your app. To use HarperDB with Next.js
Install the HarperDB Node.js client by running the following command in your project's root directory:
npm install harperdbNext, you will need to create a file called "db.js" in your project and add the following code to it:
 import HarperDB from 'harperdb';

 const client = new HarperDB({
   host: 'localhost',
   port: 9925,
   username: '<username>',
   password: '<password>',
 });

 export default client;
Replace
<username>and<password>with your HarperDB username and password.You can now use the
clientobject to perform operations on the HarperDB database. For example, you could create a function to insert a new row into a table like this:import client from './db'; const insertRow = async (table, row) => { try { const result = await client.insert({ schema: '<schema>', table: table, rows: [row], }); console.log(`Inserted ${result.affected_rows} row(s) into the ${table} table`); } catch (error) { console.log(error); } }; export { insertRow };This will insert a new row into the "users" table with the name and age fields.
You can also create functions to retrieve rows from the database or perform other operations, such as updating or deleting rows. For example, you could create a function to find all rows in a table like this:
import client from './db';

const findRows = async (table) => {
  try {
    const result = await client.query({
      schema: '<schema>',
      table: table,
      action: 'select',
    });
    console.log(result.rows);
  } catch (error) {
    console.log(error);
  }
};

export { findRows };
You can then use the findRows function to retrieve all rows from the "users" table:
import { findRows } from './db';

findRows('users');
you can use HarperDB with Next.js by installing the HarperDB Node.js client, connecting to a HarperDB server, and performing operations on the database using functions. This allows you to store and retrieve data for your Next.js app using HarperDB.
Firebase with Next.js
Go to the Firebase website and create a new project.
Install the Firebase npm package by running the following command in your project's root directory:
npm install firebase
Next, you will need to create a file called "firebase.js" in your project and add the following code to it:
 import firebase from 'firebase';

 const config = {
   apiKey: '<API_KEY>',
   authDomain: '<PROJECT_ID>.firebaseapp.com',
   databaseURL: 'https://<DATABASE_NAME>.firebaseio.com',
   projectId: '<PROJECT_ID>',
   storageBucket: '<BUCKET>.appspot.com',
   messagingSenderId: '<SENDER_ID>',
 };

 firebase.initializeApp(config);

 export default firebase;
Replace
<API_KEY>,<PROJECT_ID>,<DATABASE_NAME>,<BUCKET>, and<SENDER_ID>with the values from your Firebase project.You can now use the
firebaseobject to perform operations with Firebase. For example, you could create a function to add a new document to a collection like this:
import firebase from './firebase';

const addDocument = async (collection, document) => {
  try {
    const result = await firebase.firestore().collection(collection).add(document);
    console.log(`Added document with ID: ${result.id}`);
  } catch (error) {
    console.log(error);
  }
};

export { addDocument };
You can then use the addDocument function to add a new document to the "users" collection:
import { addDocument } from './firebase';

const document = {
  name: 'John',
  age: 30,
};

addDocument('users', document);
This will add a new document to the "users" collection with the name and age fields.
You can also create functions to retrieve documents from the database or perform other operations, such as updating or deleting documents. For example, you could create a function to find all documents in a collection like this:
import firebase from './firebase';

const findDocuments = async (collection) => {
  try {
    const snapshot = await firebase.

firestore().collection(collection).get();
console.log(snapshot.docs);
} catch (error) {
console.log(error);
}
};

export { findDocuments };
You can then use the findDocuments function to retrieve all documents from the "users" collection.
Conclusion:
In conclusion, Next.js is a powerful JavaScript framework that allows you to build full-stack applications with ease. With its built-in support for server-side rendering, automatic code splitting, and optimized performance, Next.js makes it easy to build high-performance and scalable applications. Additionally, the ability to use Next.js with a variety of databases and authentication methods, such as MongoDB, HarperDB, and Firebase, makes it a versatile choice for building full-stack applications.
If you want to build a full-stack application with Next.js, there are a few key things to keep in mind:
Set up your development environment with Next.js and your preferred code editor or development environment, such as Visual Studio Code or GitHub Codespaces.
Use the
pagesdirectory to define your application's routes and create React components for each page.Take advantage of Next.js's built-in CSS support to style your application, or use a CSS framework like Tailwind CSS.
Use a database and authentication method to store and retrieve data and handle user authentication. Options include MongoDB, HarperDB, and Firebase.
By following these steps, you can build a full-stack application with Next.js that is fast, scalable, and easy to maintain.